The creation process of a natural planter box

The origin of this project comes from the choice to replace the felt separating the corridor and the open space.
The requirement was that there would be a wooden structure that could accommodate "falling" plants in order to dress the open space and remove all obstacles between the hallway and the desks.

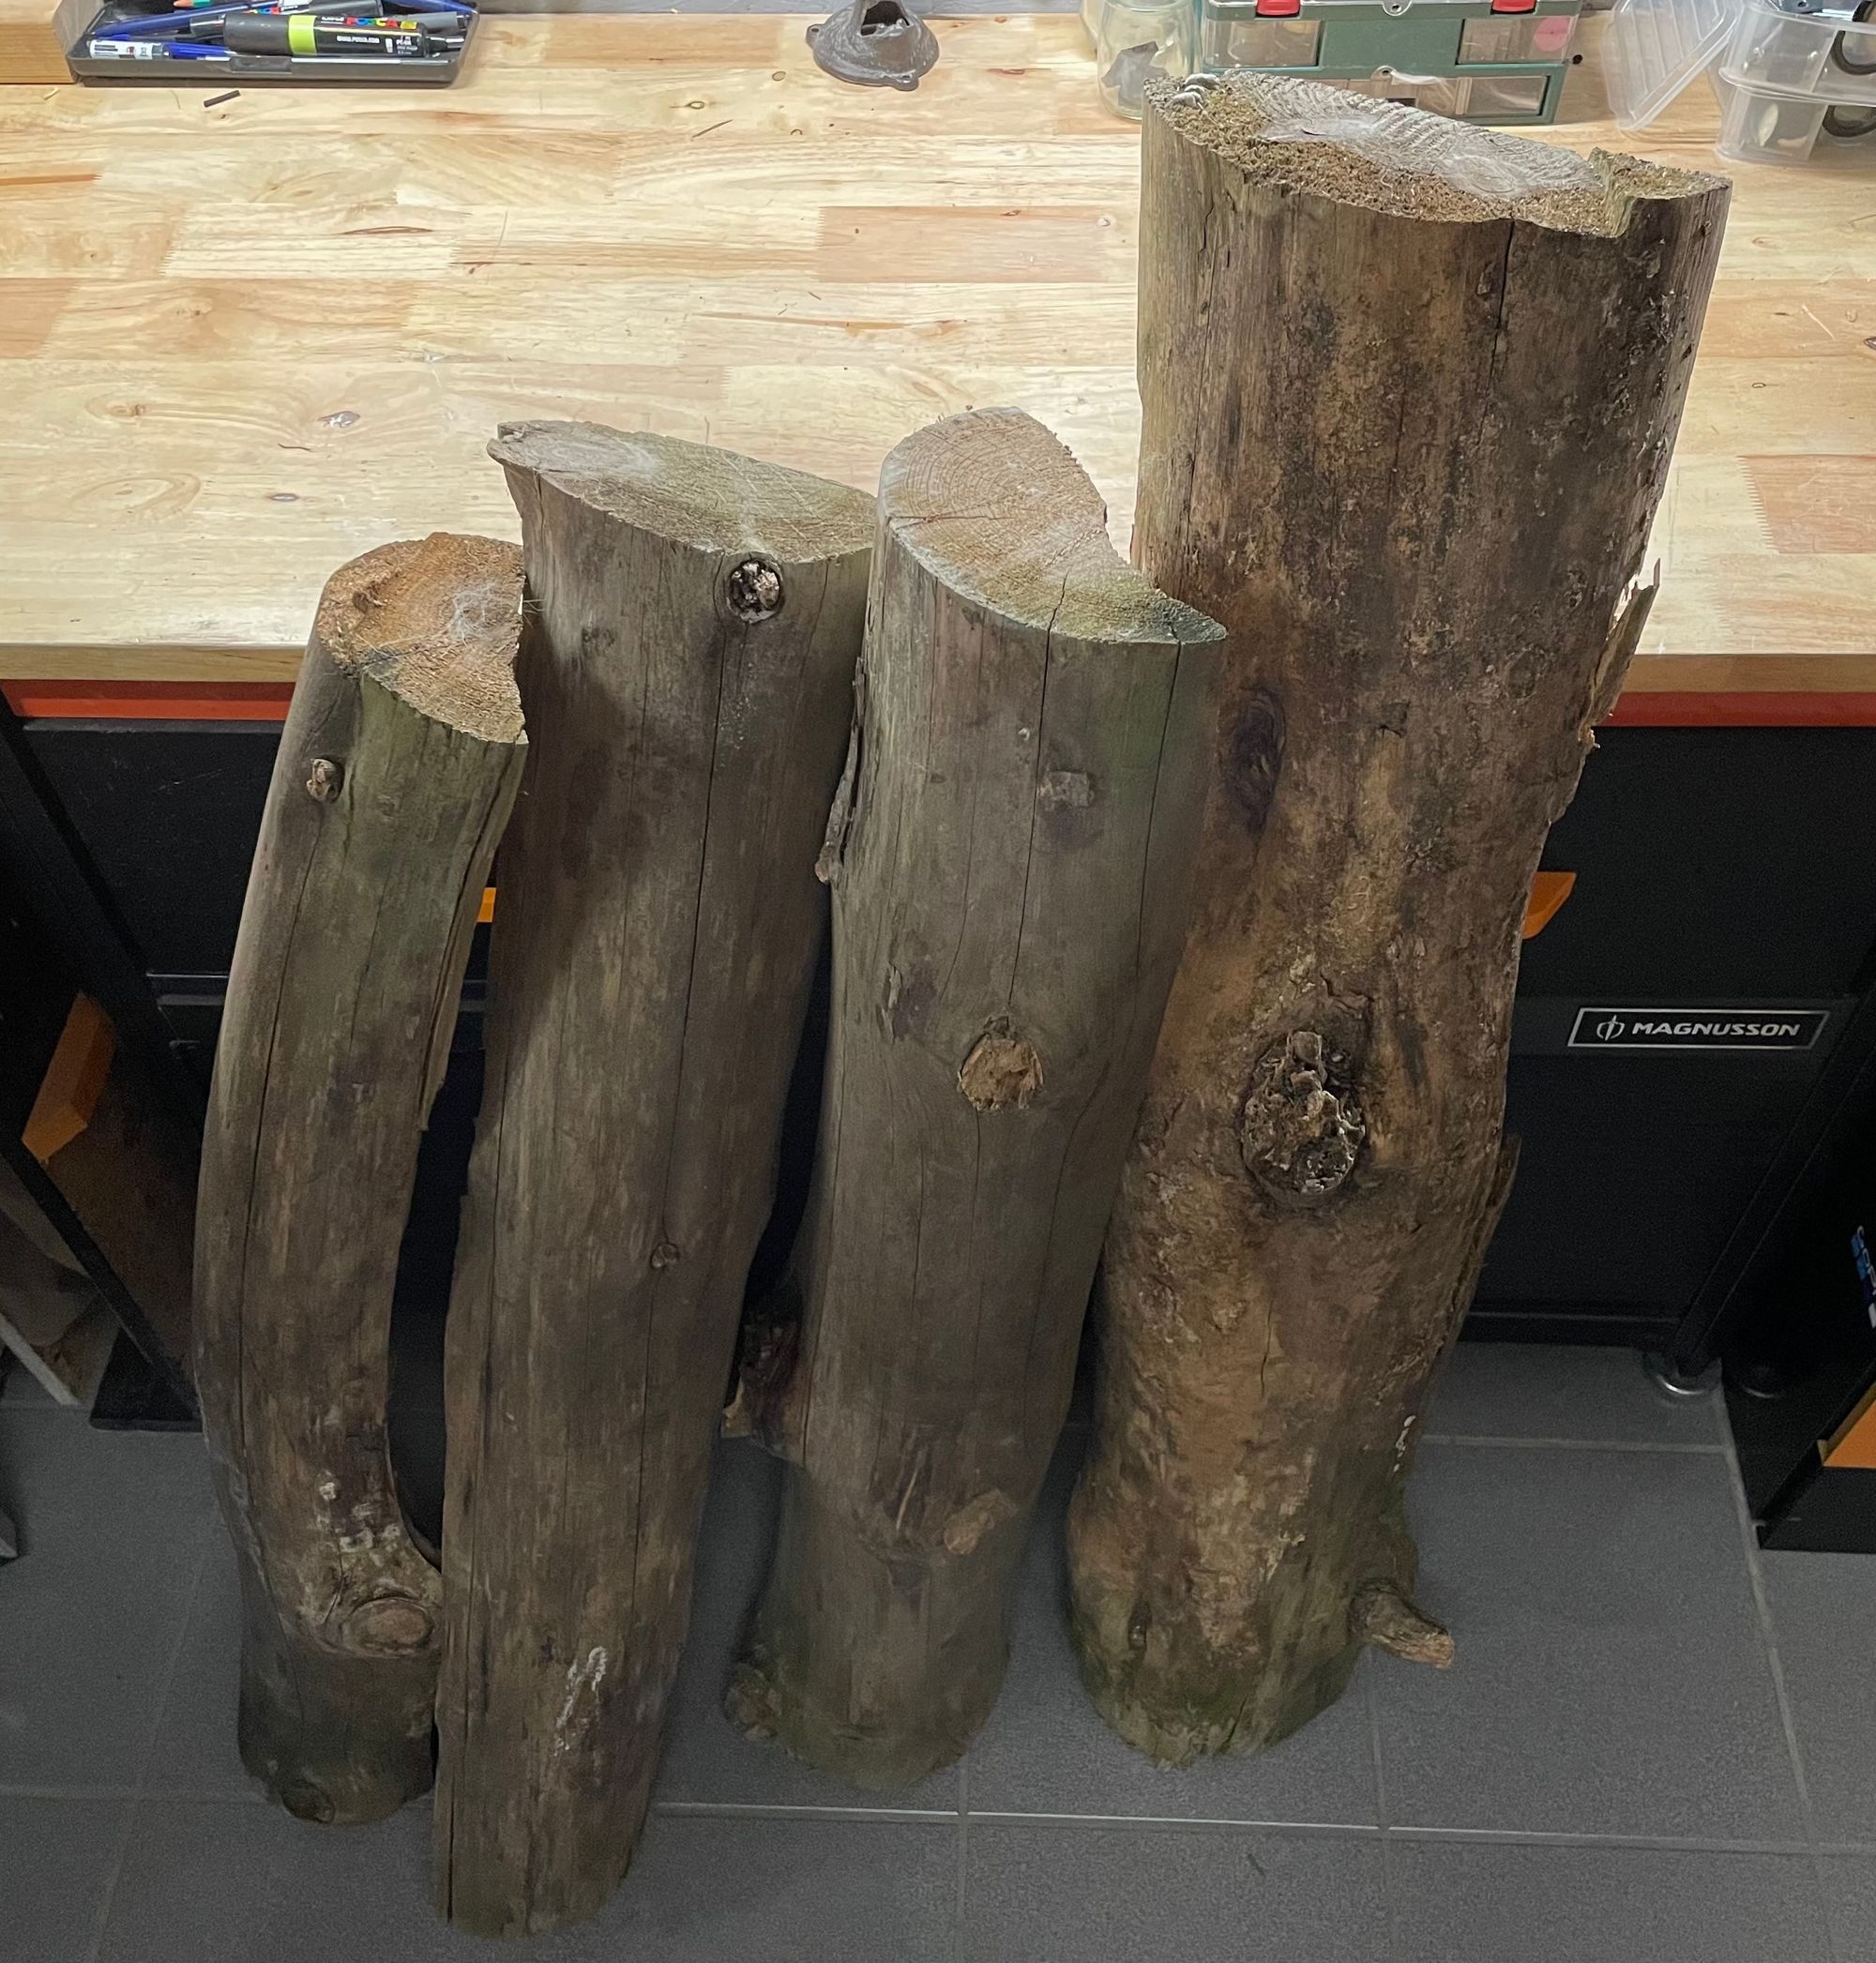
Having felled some pine trees 3 years ago, we had sections of trunk measuring approximately 1m long split in two. These dried naturally under a tarp, the bark and its under layers could be removed easily.

To work on this project we needed some tools, space and time.
TOOLS
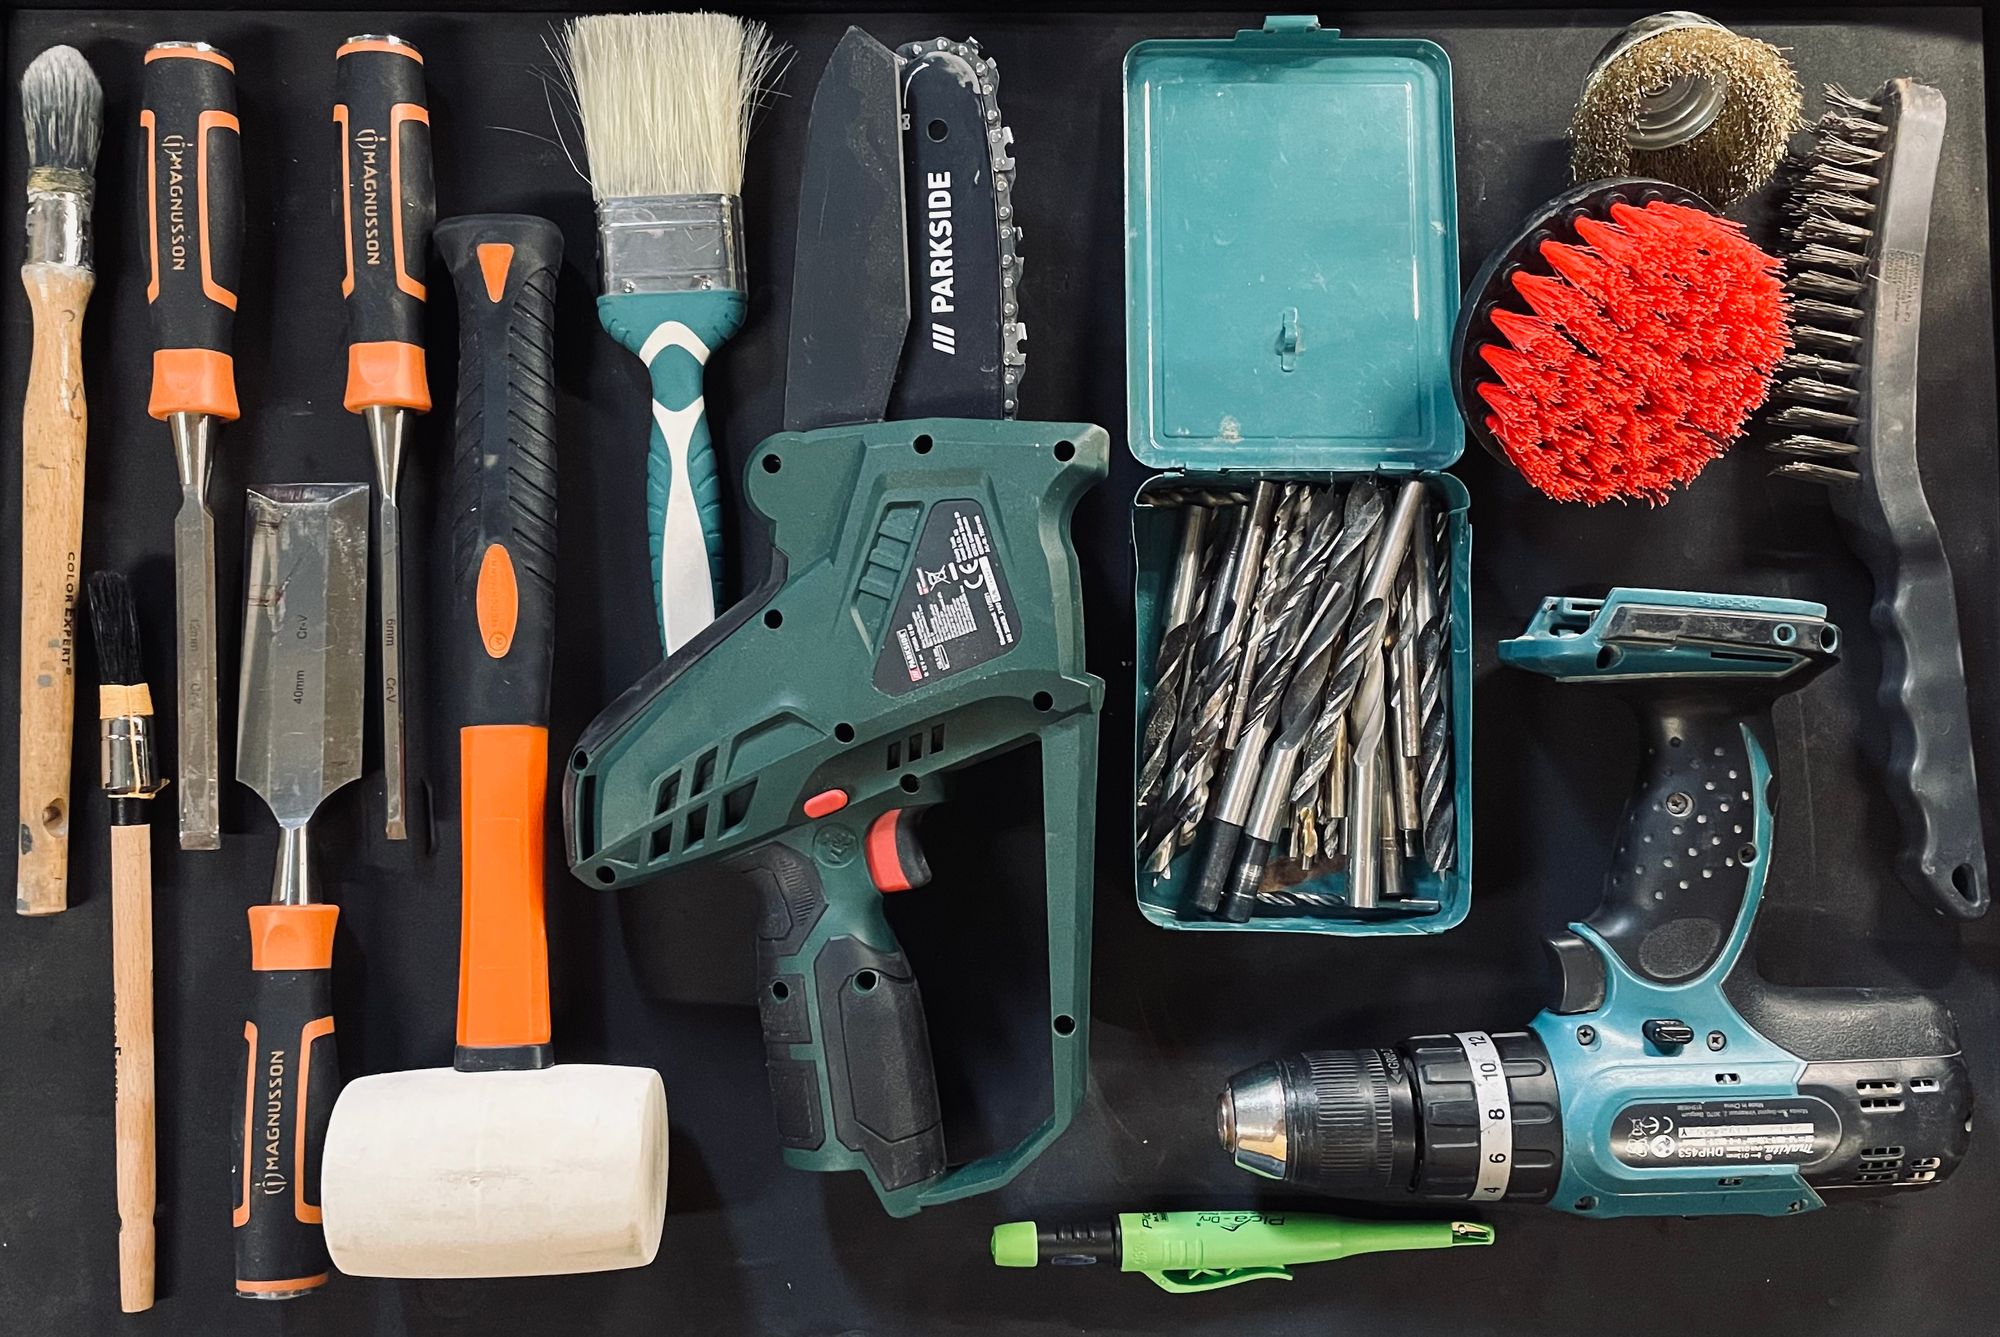
We used basic tool as wood chisel, ruler, hammer, drill, pencil, resin, wood floor sealant, steel cable and appropriate locks. Hand and eye protection, as well as anti-cutting clothing, are mandatory.
We made one planter entirely by hand, without the use of a mini electrical wood saw, it was way more time consuming!

SPACE
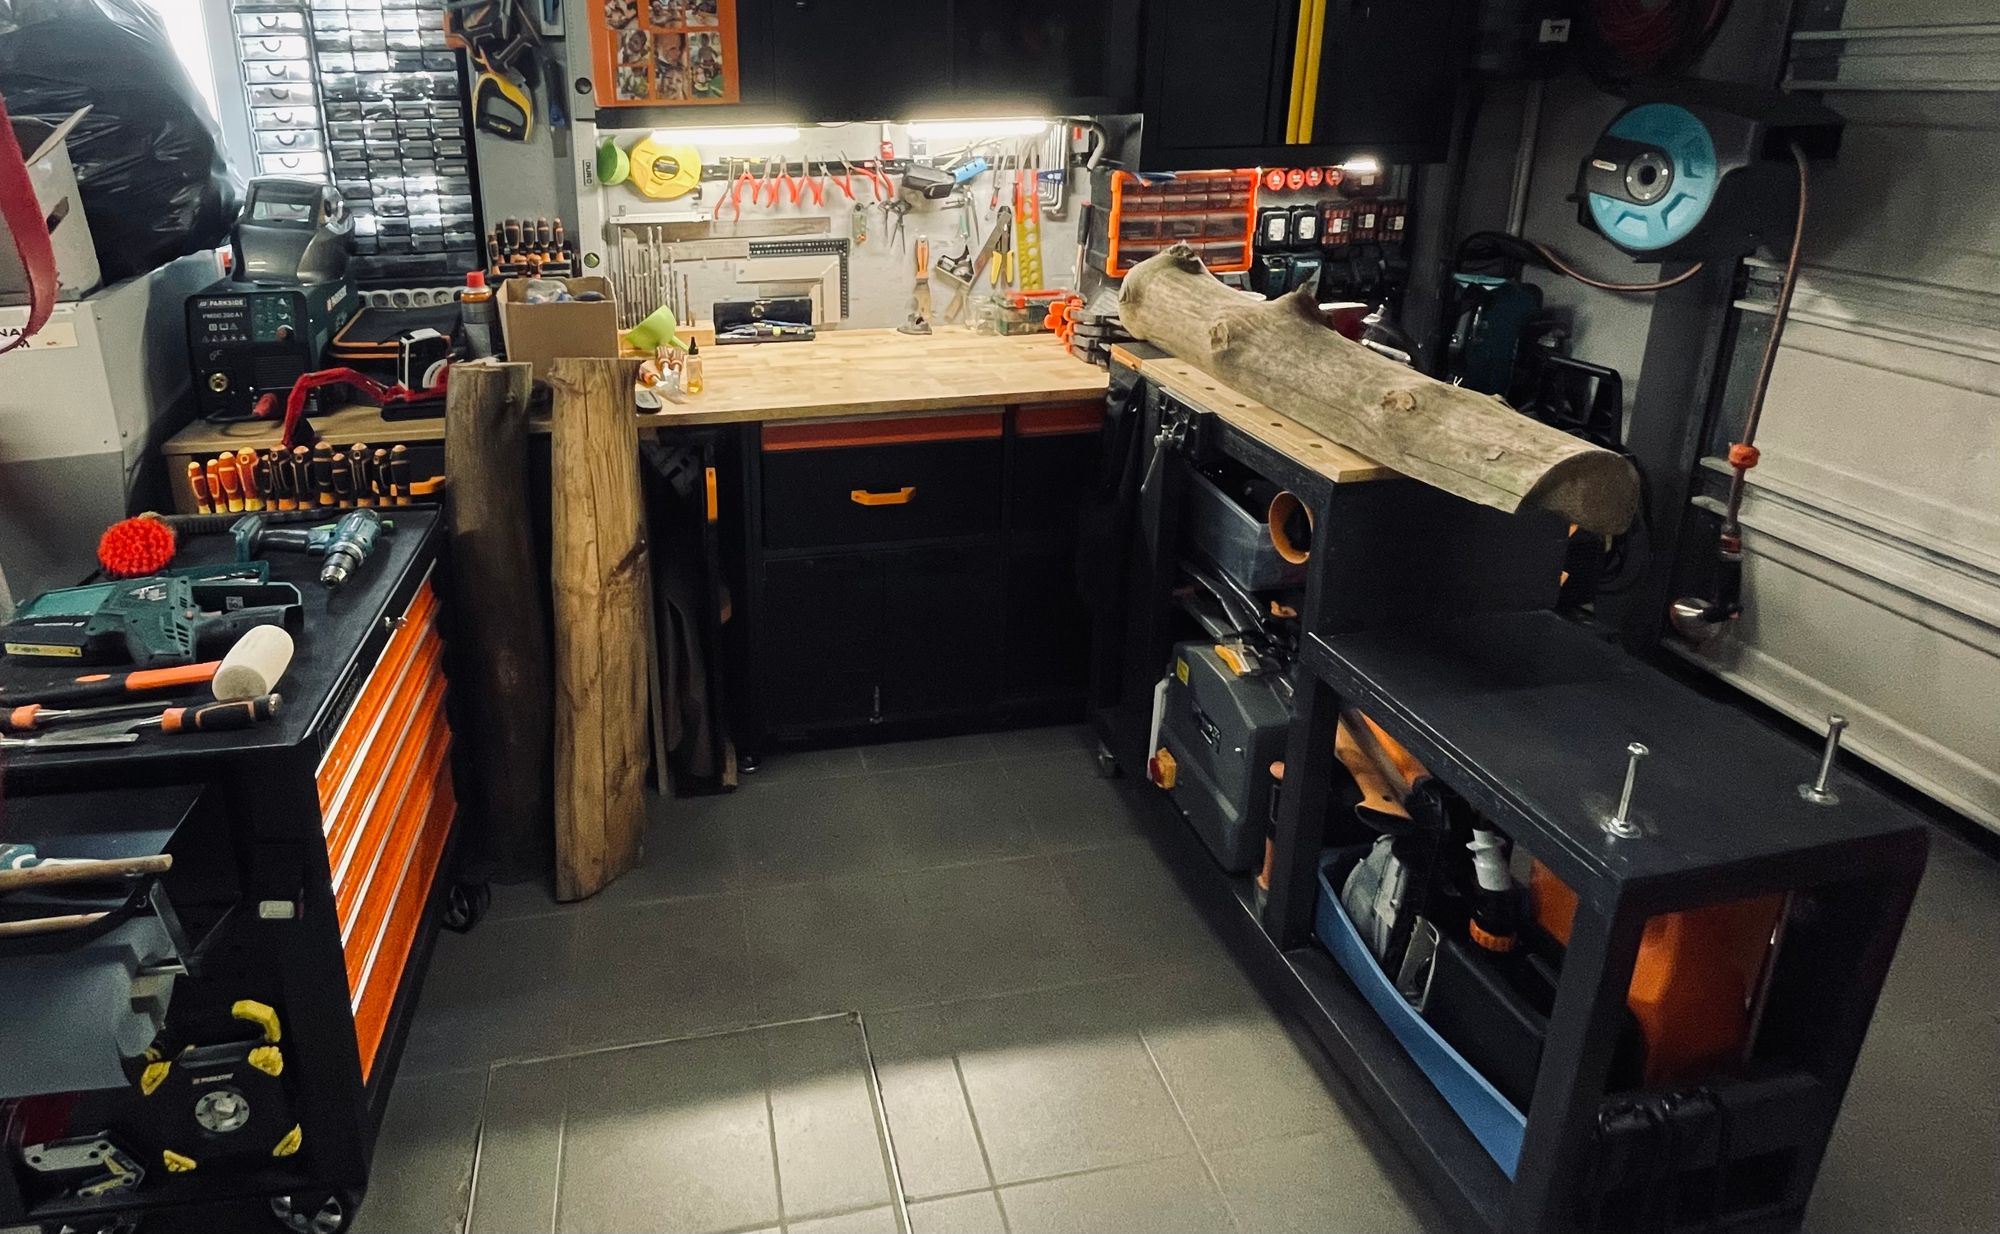
The person in charge of this project has a dedicated workspace in his garage; the best option is to have a fixed table where you can work at.

TIME
Each piece takes approximately 4 hours to complete.

Quick steps
- Remove the bark, liber, and cambium from the trunk.
- Create a support for the trunk as it doesn't need to move from the work space.
- Trace the length, remove broken pieces and try to define a plane surface.
- Using the trace, truncate the ends and the inner space along the length.
- Make some chips in the middle and excavate it.
- To avoid wood chipping, clean with a thinner chisel.
- Fill the remaining cracks with wood paste.
- Sand the entire inside and outside.
- Pour resin inside to make it waterproof.
- Apply wood sealant on the outside.
- Place the ceiling fixation.
- Put the plants !
Detailed work steps
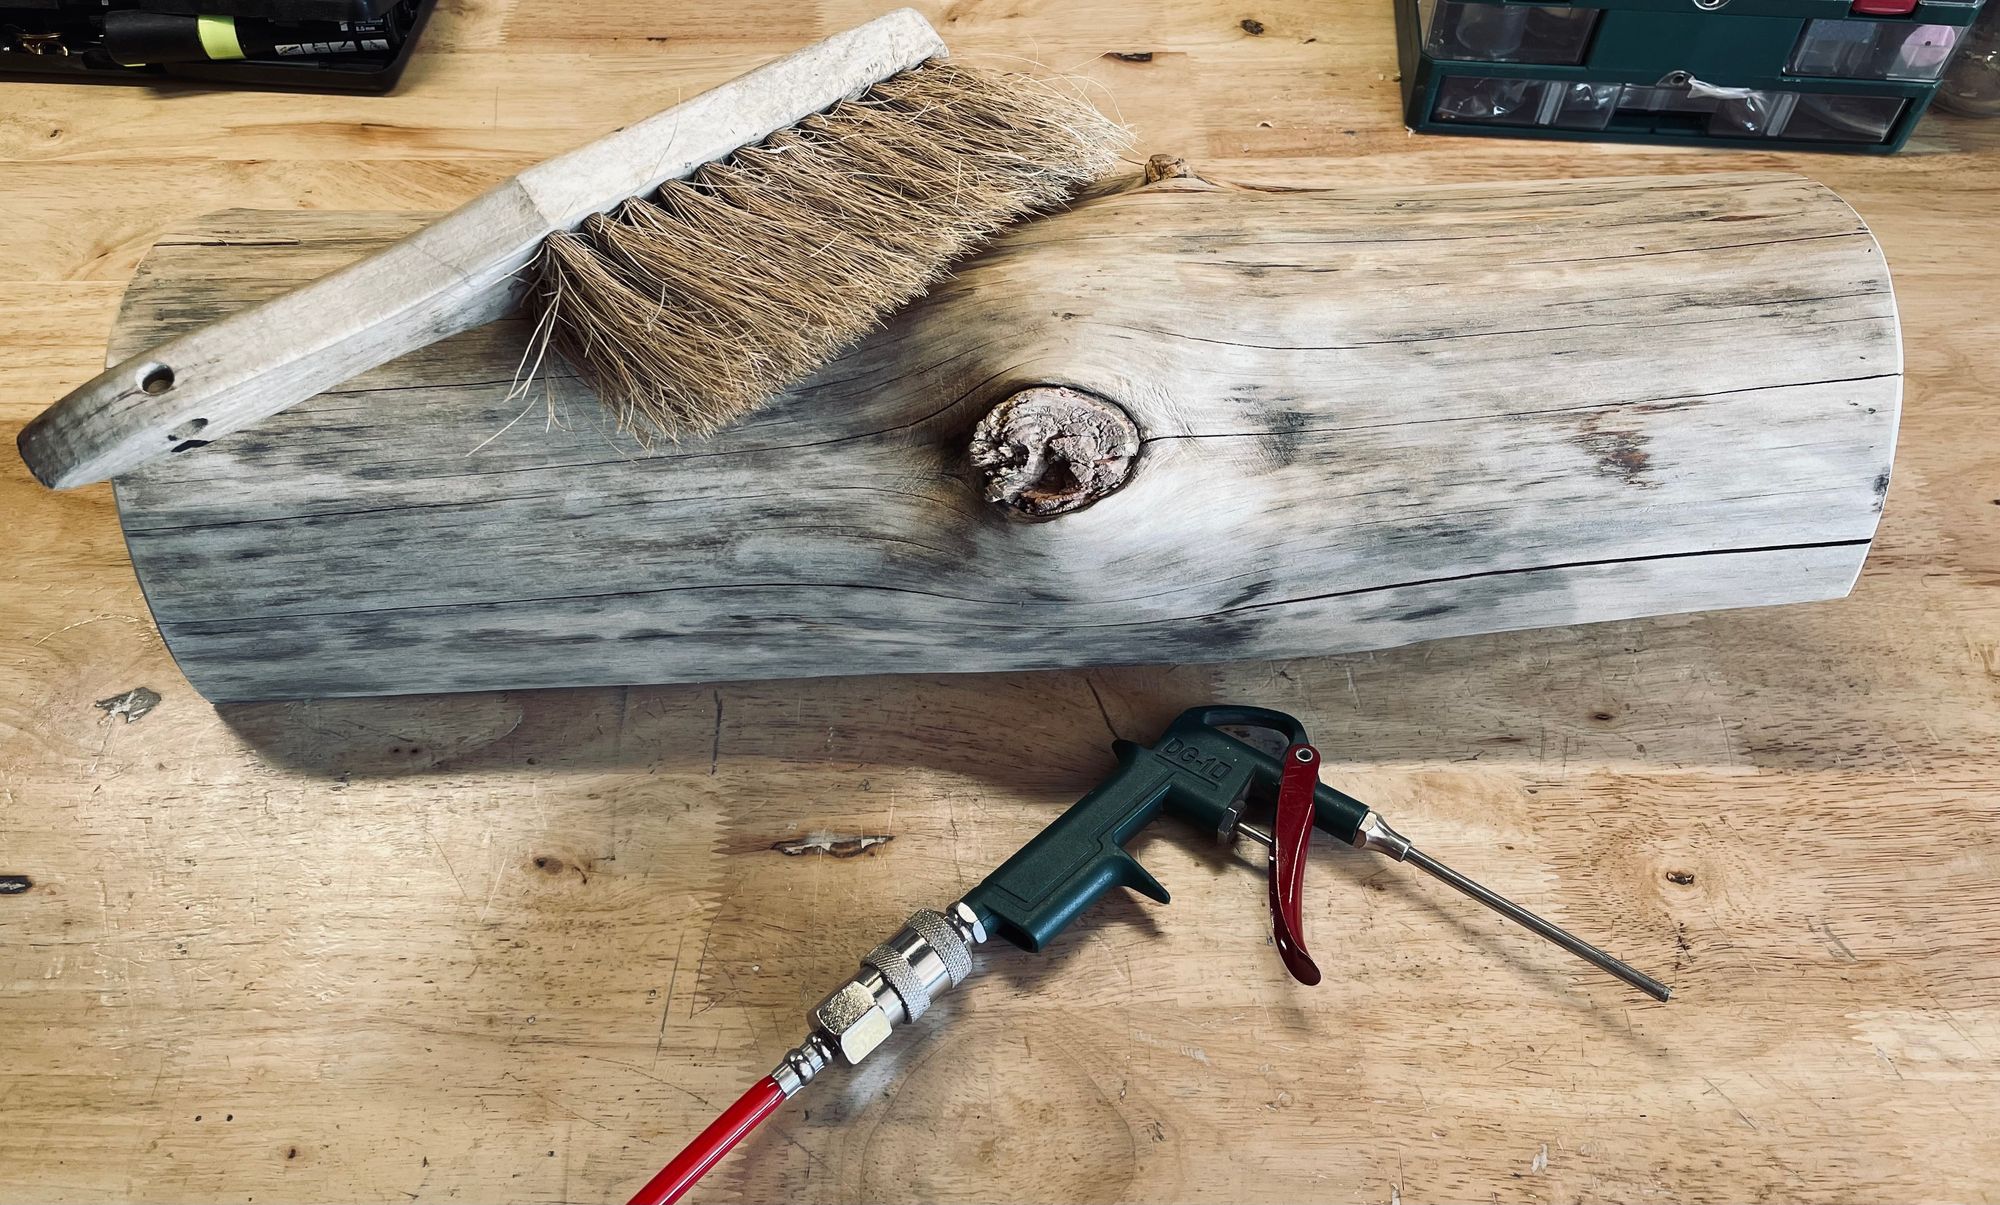
Remove the bark, liber, and cambium from the trunk.
As we planned to fix the wood from outside and use resin inside to make it waterproof. we can't afford to have little wood chips or rotten parts. This step is also mandatory to remove existing wood borers.
Create a support for the trunk as it don't need to move from the work space
With each hammer blow to the chisel, we must ensure that the wood pieces will not injure us or simply fall off and break.
Straps, vises, and homemade supports were among the tested solutions.
Trace the length, remove broken pieces and try to define a plane surface
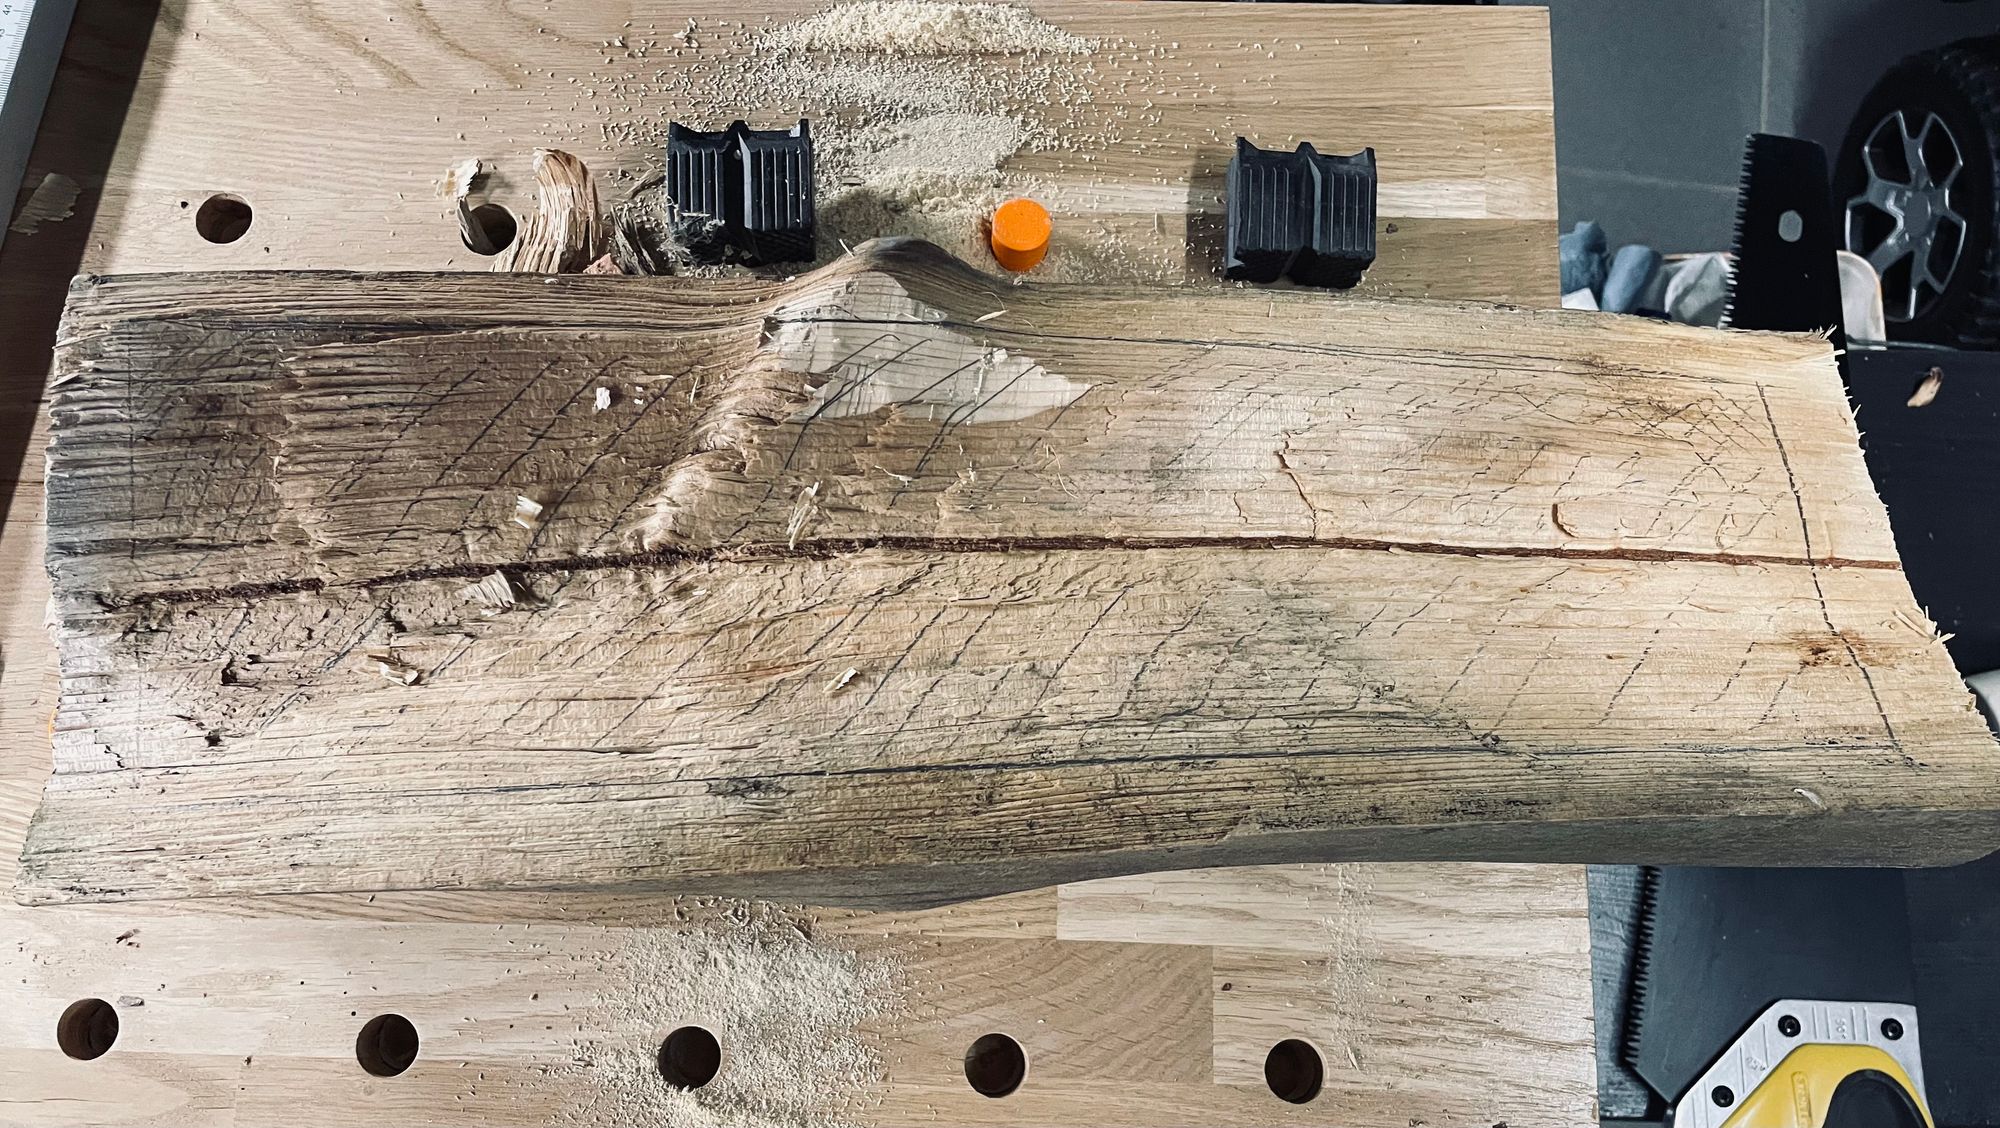
This step builds on the previous one by providing a flat view of the piece and determining where the wood will be cut and secured to the ceiling. This is the most important step because all of the others are depend on it.
The wood piece has to be as flat as possible, the trace needs to be visible and straight and you need to measure and estimate the depth of the cut.
Using the trace, truncate the ends and the inner space along the length.
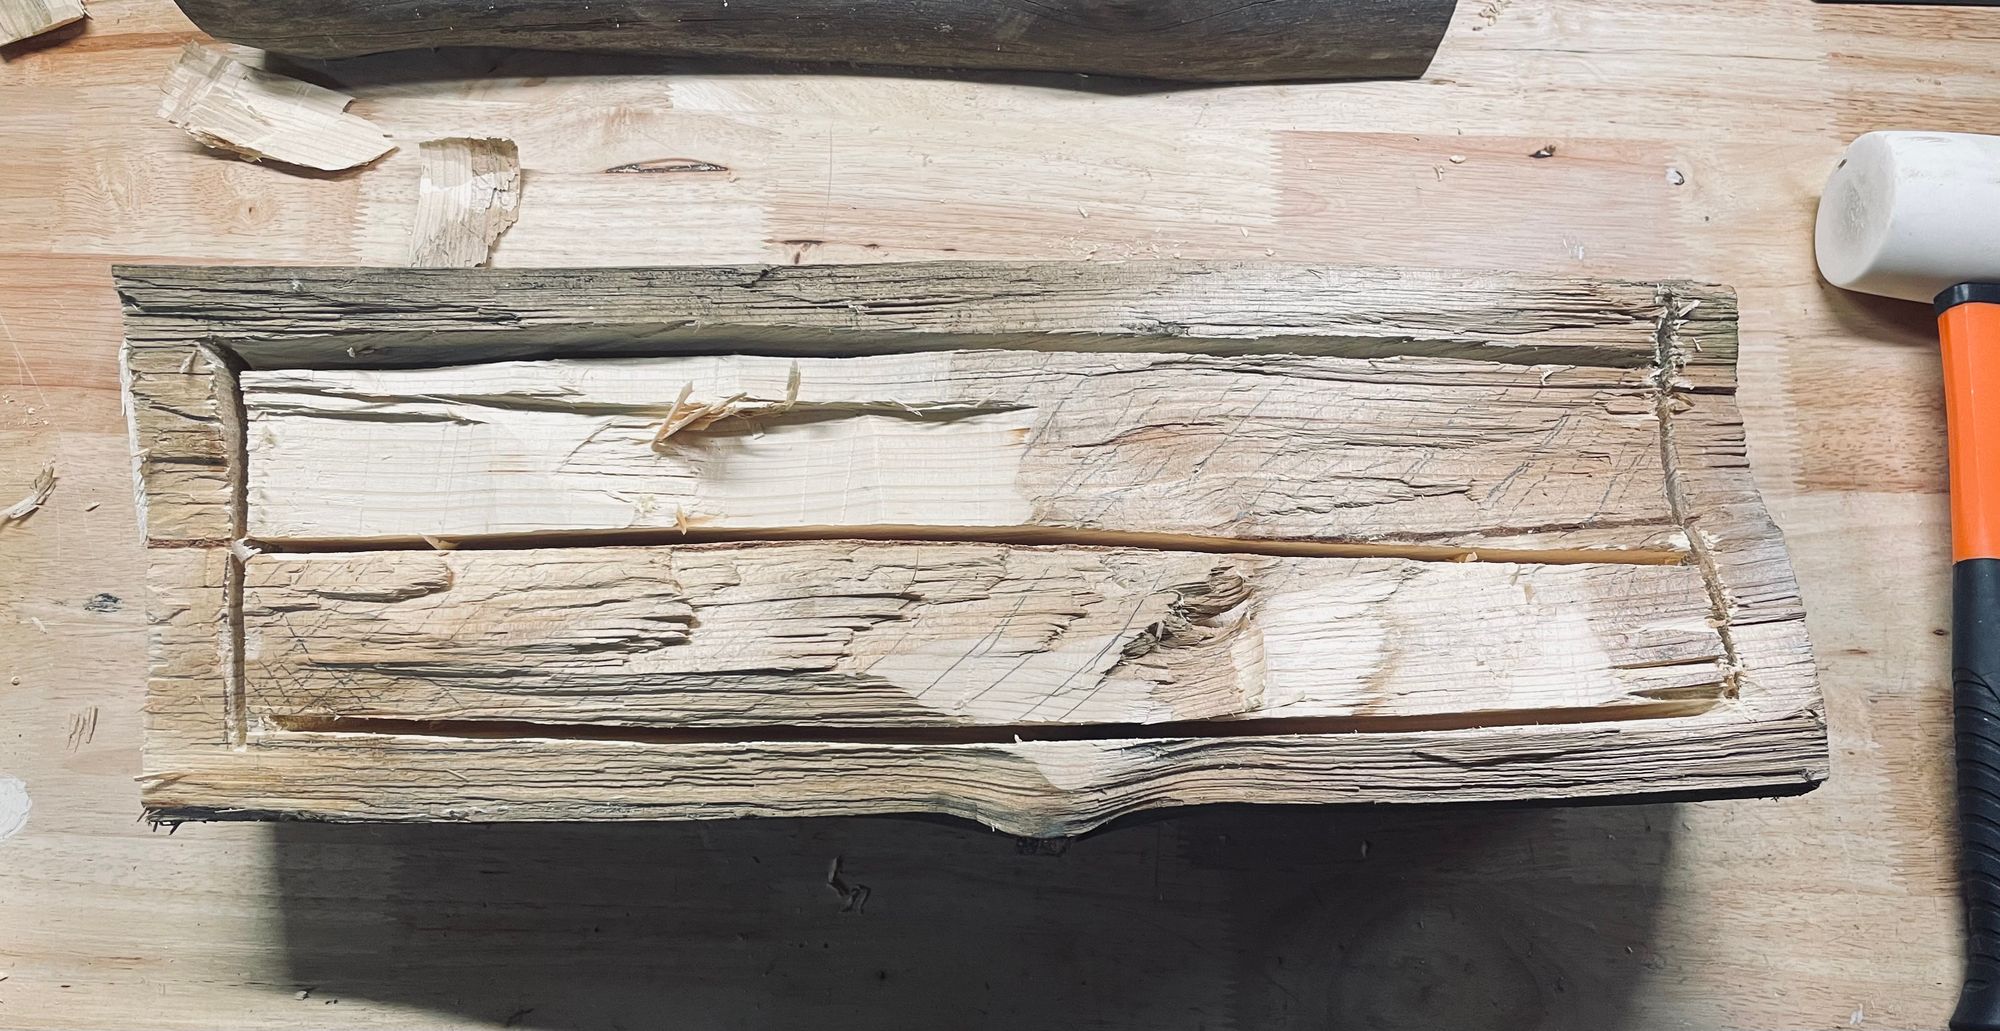
This step allowed the chisel to be used without much effort while avoiding mistakes such as cutting too deep or wood cracking.
Make some chips in the middle and excavate it.
This is the most time-consuming and involves arm work. (Keep the wood chips in a box for when you want to start the next barbecue.)
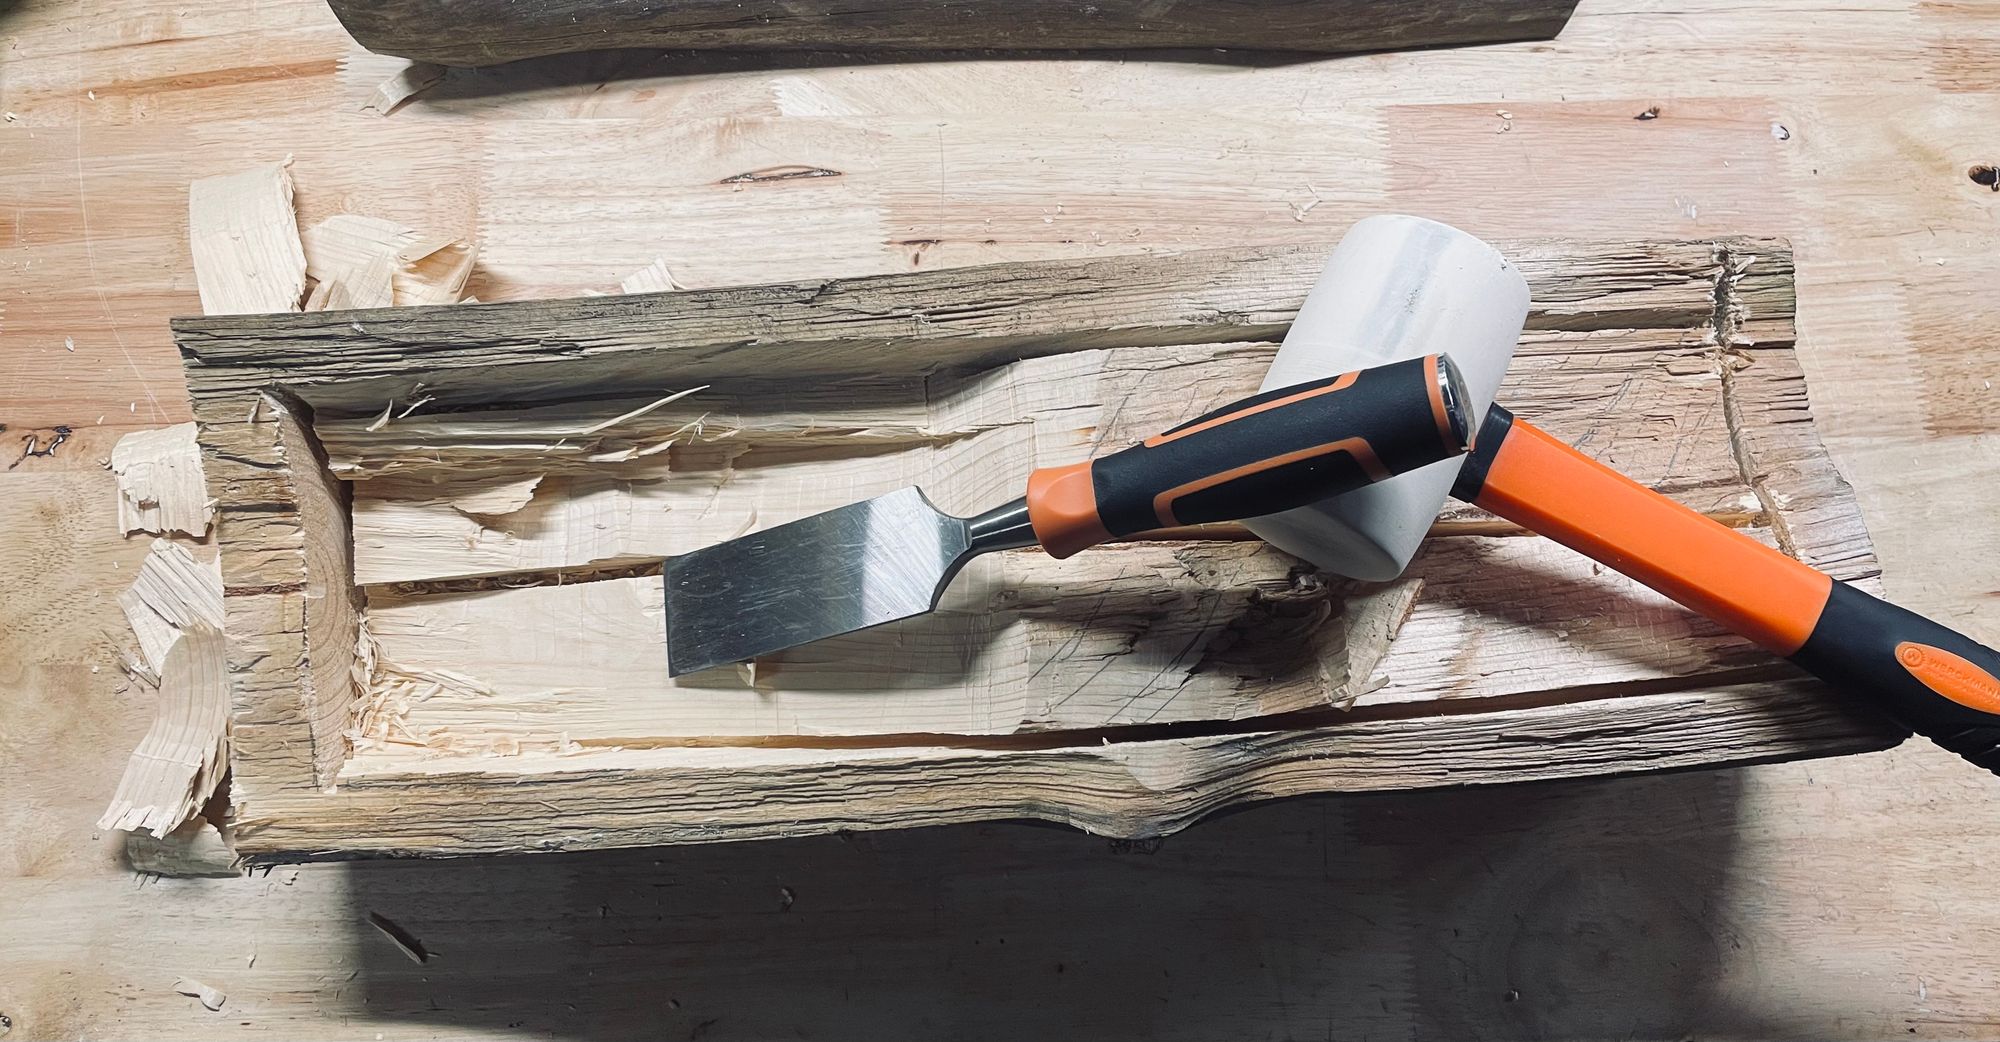
To avoid wood chipping, clean with a thinner chisel.

A chisel and any other tool capable of cleaning the crack as deeply as possible are used. The goal is to smooth out the surface as much as possible.
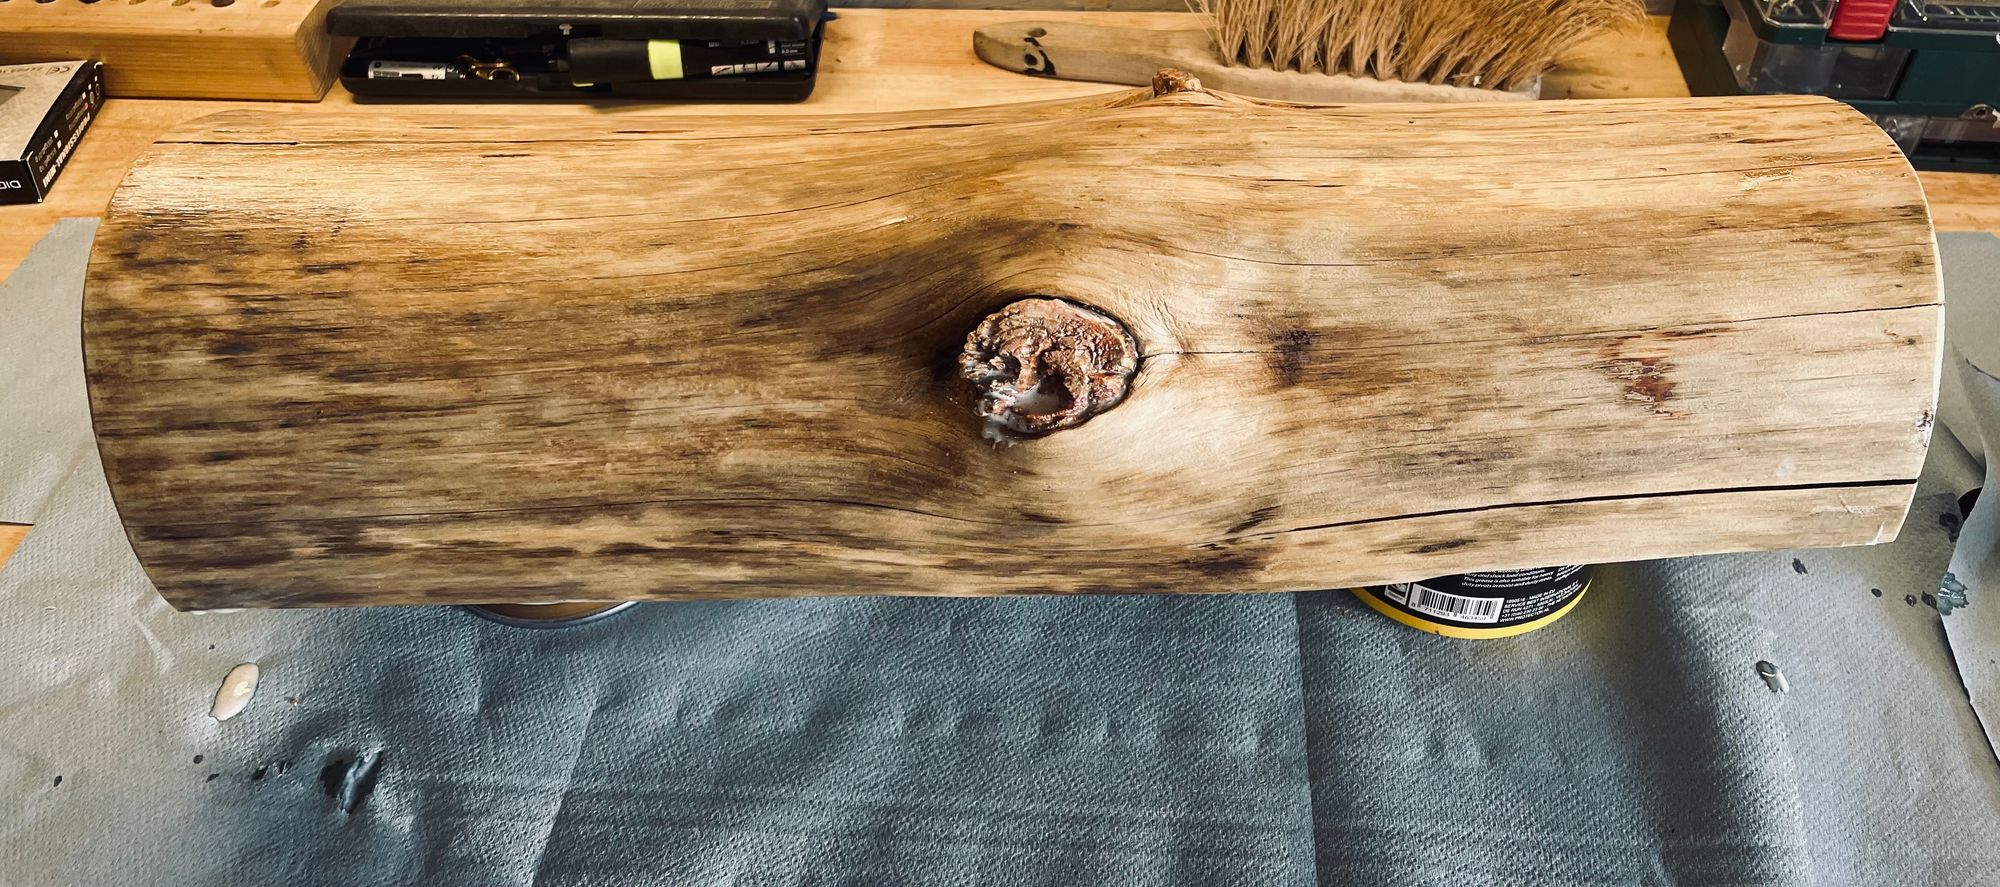
Fill the remaining cracks with wood paste.
Because the resin will be fluid, we must avoid leaks when pouring it. This is why every crack must be generously filled. Non-smooth areas can also be fixed.
Sand the entire inside and outside

This step will take some time because it must be done correctly. Always keep your work area clean.
Pour resin inside to make it waterproof
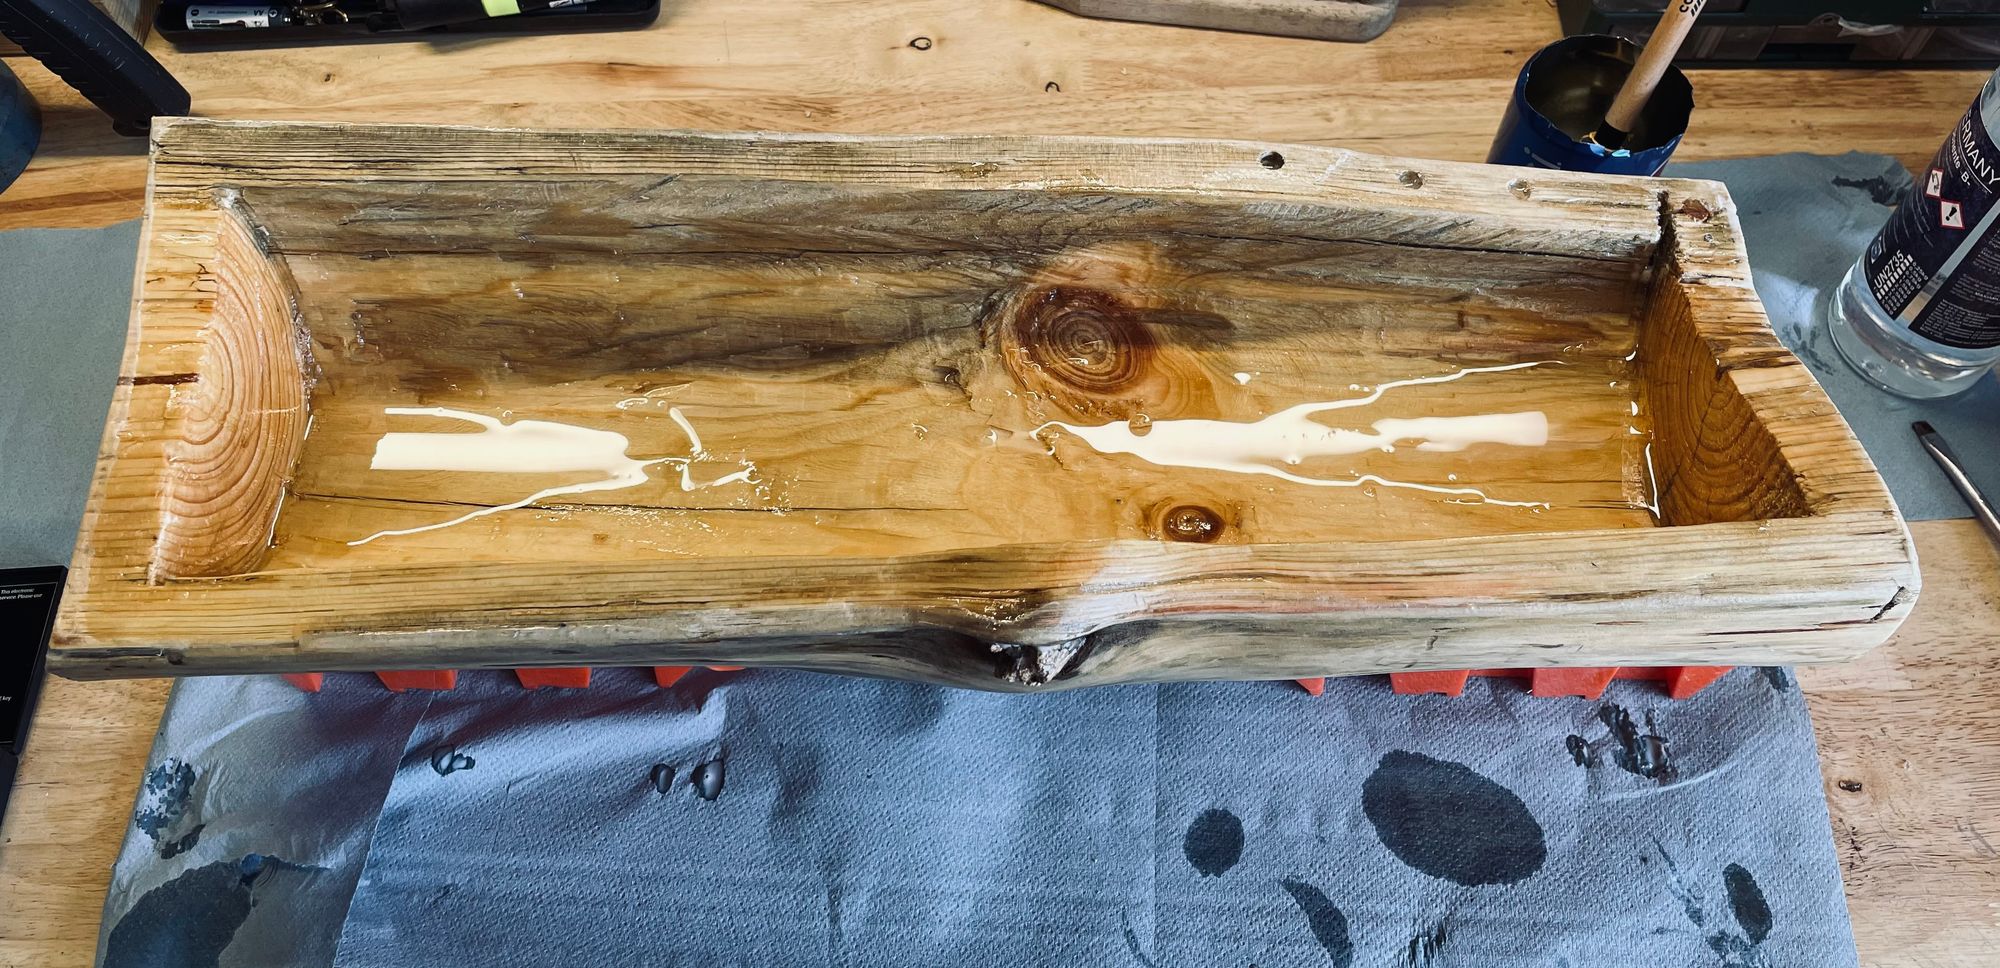
We chose resin because it can function as a self-leveling sealant and is waterproof once its dry.
Apply wood sealant on the outside
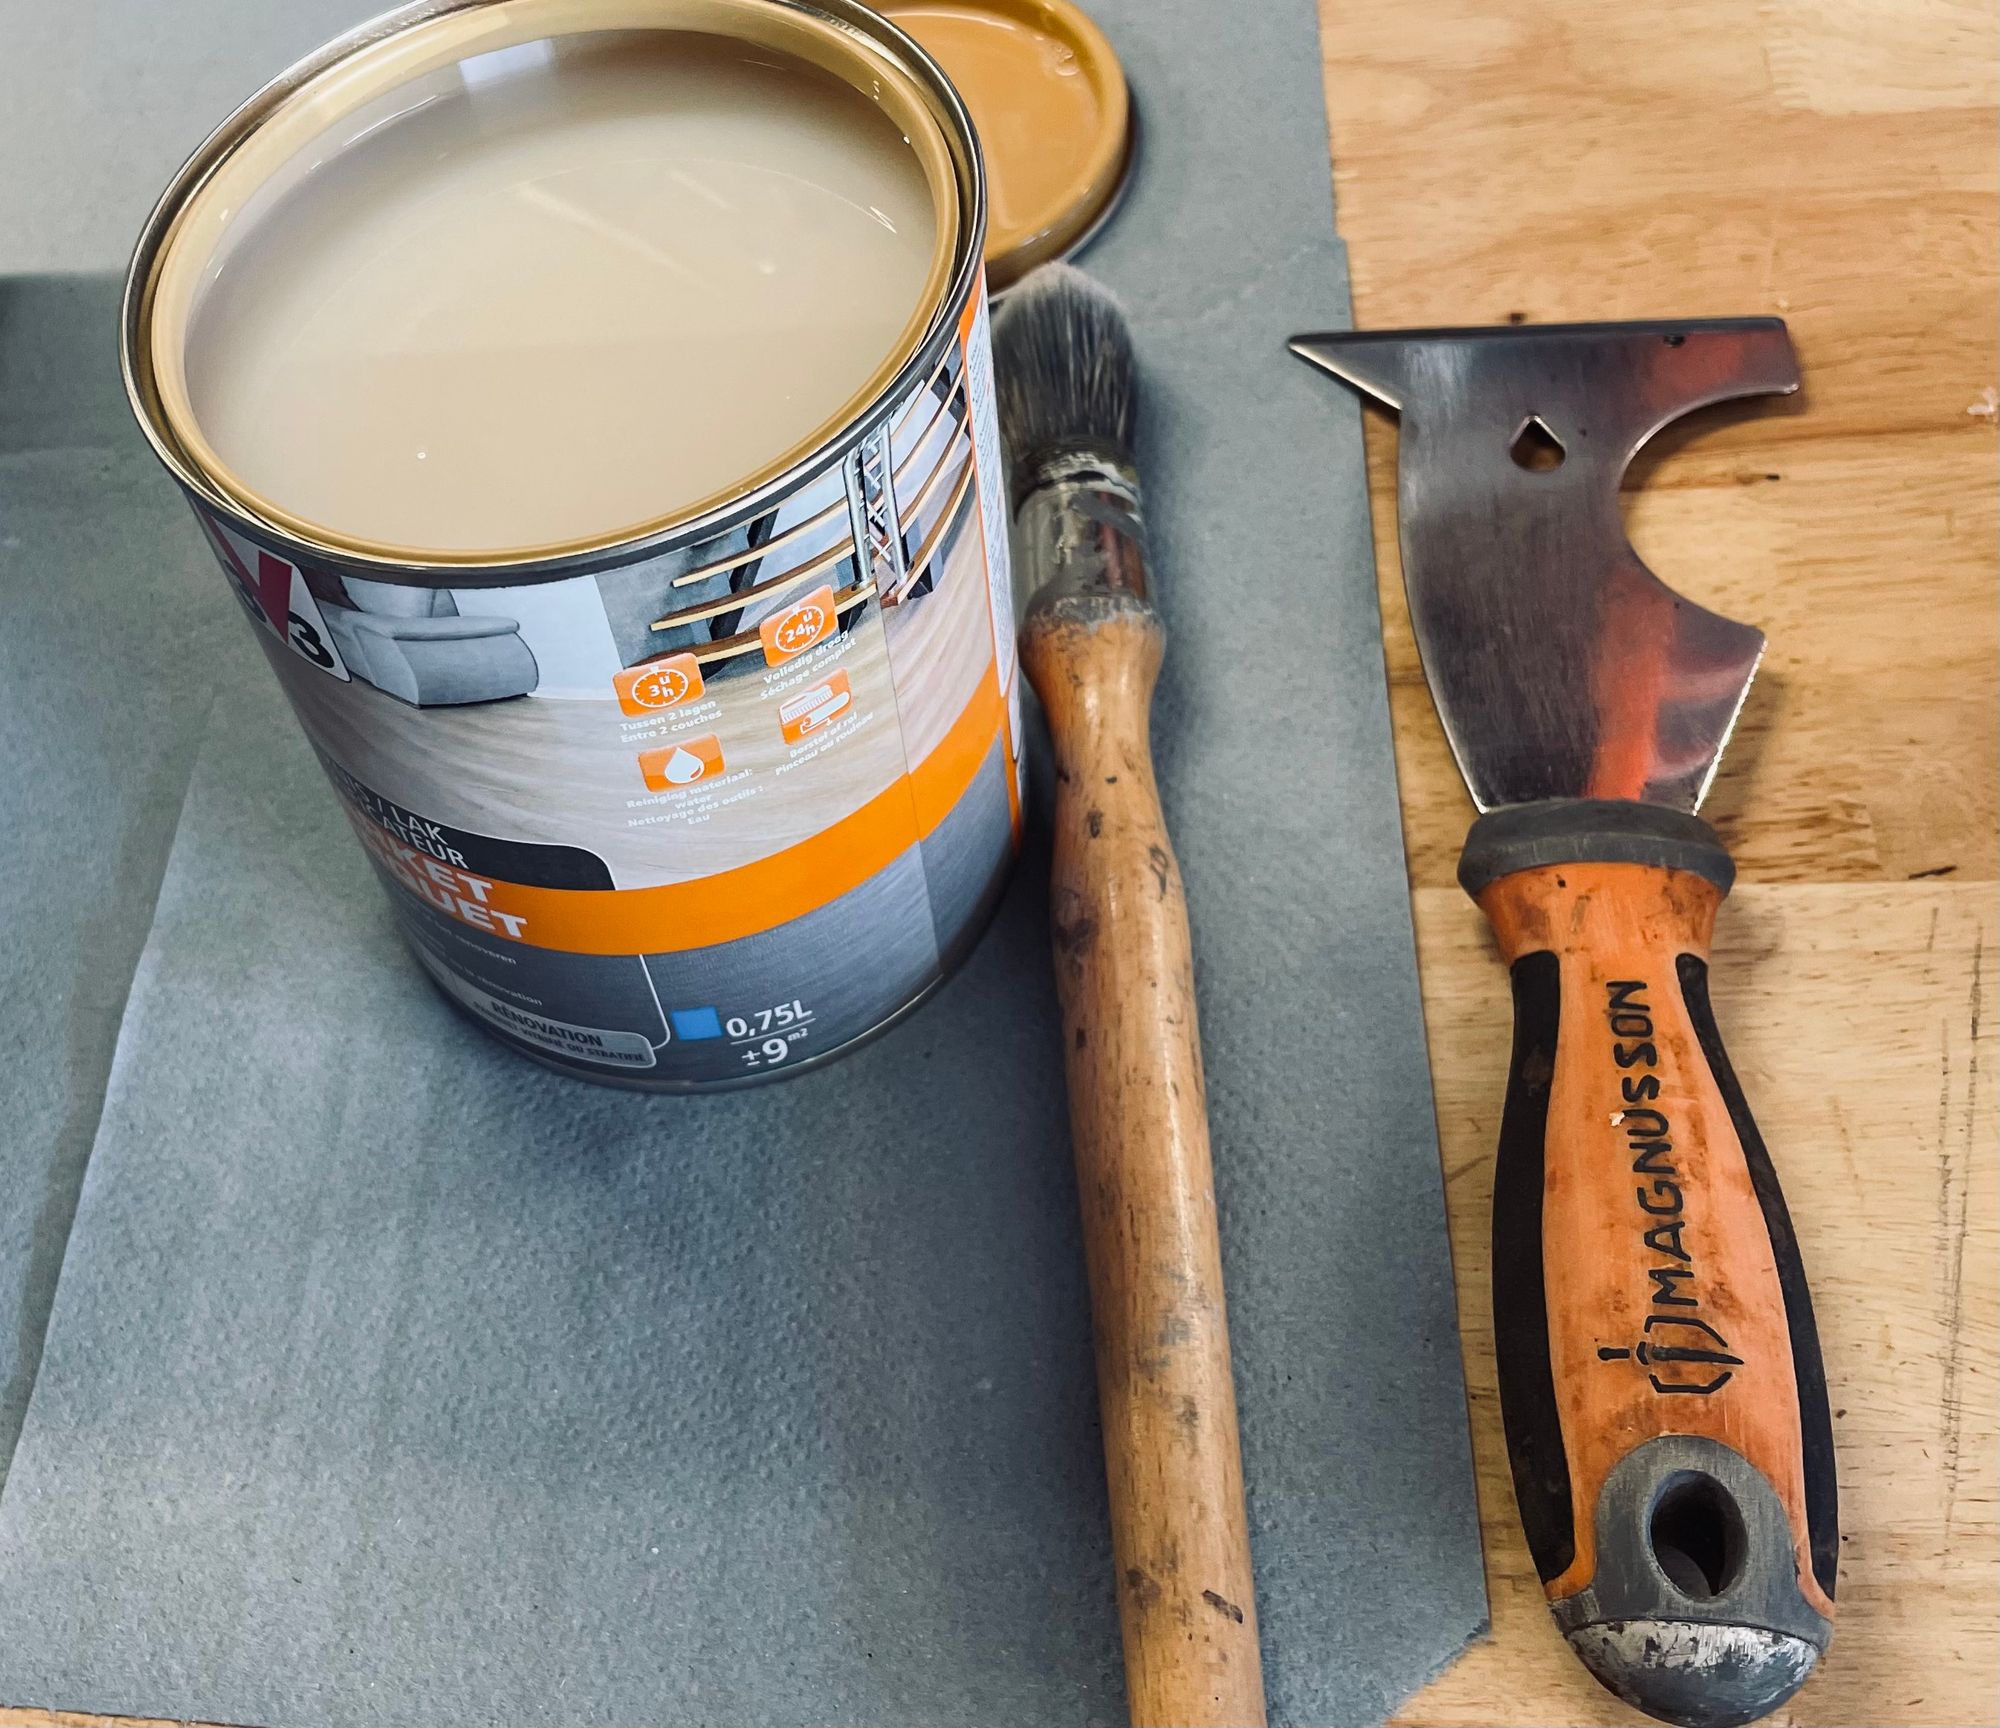
Sealant must be applied multiple times because it penetrates the first wood layer; read the product recommendations, which are largely the same for all brands. Apply, sand, apply, sand, .. We applied a three-layer sealant; the result will be visible 24-48 hours later, and the wood should be "harder." The goal is to set the wood and prevent future cracks.
Place the ceiling fixation

Fixtures are as symmetric as possible, with a hole through the thickness of the piece and a larger space on the bottom for the cable to pass through. Inside, we used mecanindus to avoid rubbing on the wood and 2mm metal cable for support.
Put the plants
You can put small or large plants; the only requirement is that they have small roots.
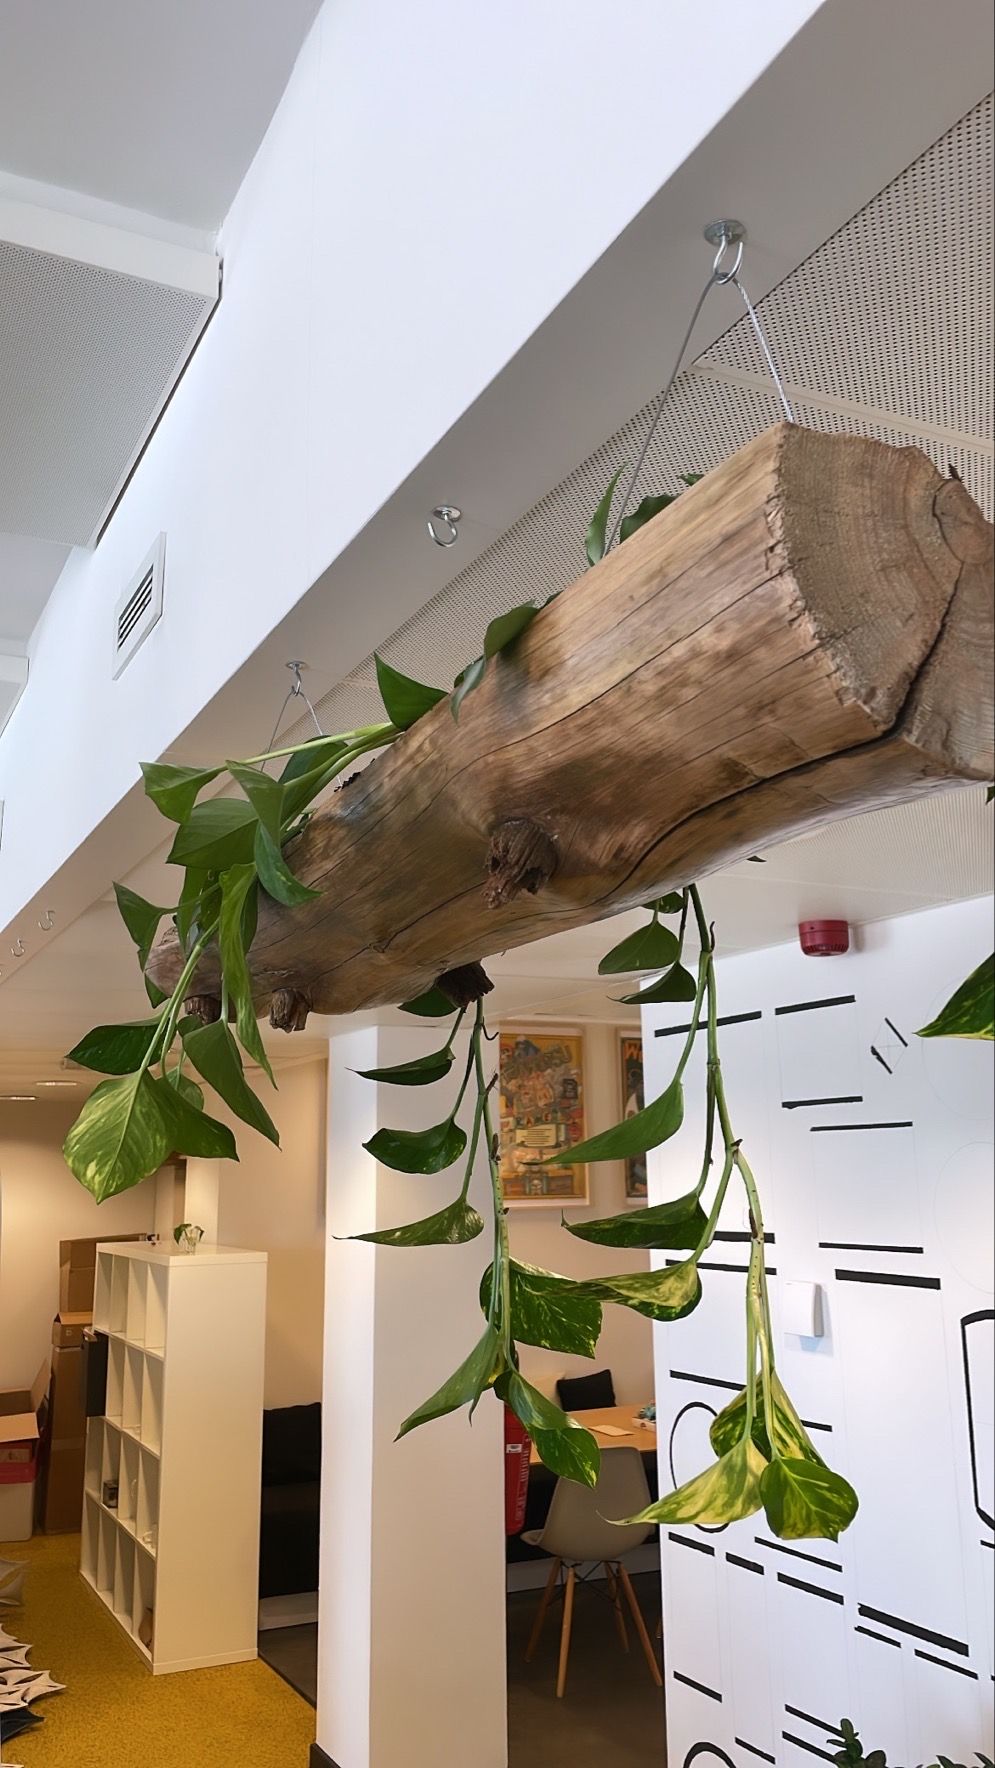
And voila! We now have our own planter box!
This project may take some time to complete, but the results are often amazing. It can be exciting to watch a project come together and see the final product!