How to create a blog using Astro and Keystatic
In this post, we'll learn to create a blog with Keystatic, integrated in Astro. You'll find a s step-by step guide to configure, create and display your content.
What is Keystatic ?
Keystatic is a Thinkmill project that allows you to write and manage your content in a UI tool (that looks like a CMS) rather than your IDE.Your content can be stored locally or on GitHub, and no database is required. You can integrate Keystatic with Astro, Next.js and Remix.
What is Astro ?
Astro is a framework for creating content-driven, high-performance websites. Astro will render your components to static HTML during the build process, making it ideal for content-first websites.
Building our new blog
Installation
Let's set up a new Keystatic project in Astro.
First we create a new Astro project:npm create astro@latest your-project-name.
Then we can install dependenciesnpx astro add react
and some packages.npm install @keystatic/core @keystatic/astro
Configuration
A configuration file is required. Make a file called 'keystatic.config.tsx' in the root of your project. For our new blog, we will provide options that meet our requirements.
import { config, fields, singleton, collection } from '@keystatic/core'

export default config({
    storage: {
        kind: 'local',
    },

    singletons: {
        homepage: singleton({
            label: 'HomeTitle',
            path: 'src/content/homepage',
            schema: {
                headline: fields.text({ label: 'HomeText' }),
            },
        }),
    },

    collections: {
        articles: collection({
            slugField: "path",
            label: 'Articles',
            path: 'src/content/collections/articles/*/',
            schema: {
                path: fields.slug({name: {label: 'path'}}),
                title: fields.text({label: 'Title'}),
                cover: fields.image({label: 'Cover Image',}),
                date: fields.date({label: 'Date'}),
                text: fields.document({
                    label: 'Text',
                    formatting: true,
                    links: true,
                    dividers: true,
                    tables: true,
                    images: true,
                }),
            }
        }),
    }
})
Let's analyse the code above:
These lines indicate that your content will be stored locally. You can also store your content on a Github repository with Keystatic.
storage: {
    kind: 'local',
},
Singletons
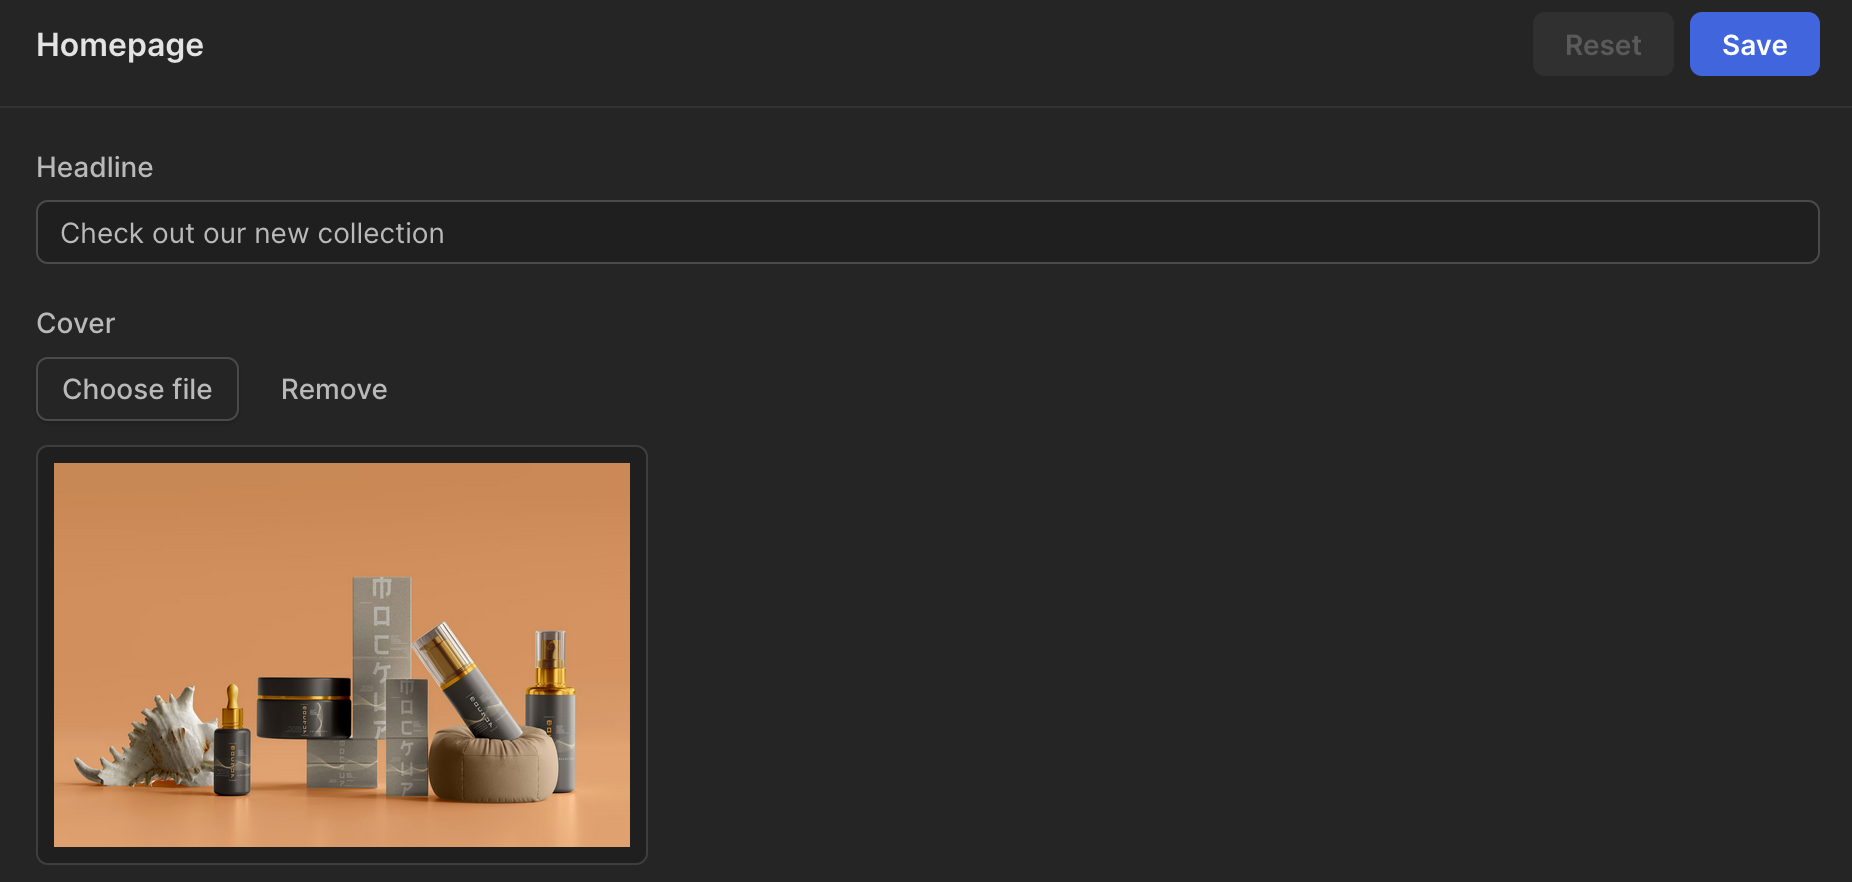
Singletons represent a "single" piece of data, such as the title of our website. You must provide a label and a schema, as well as the format of our data. Our title will be a simple text line in this case. We also specify where our content will be stored.
singletons: {
    homepage: singleton({
        label: 'HomeTitle',
        path: 'src/content/homepage',
        schema: {
            headline: fields.text({ label: 'HomeText' }),
        },
    }),
},
Collections
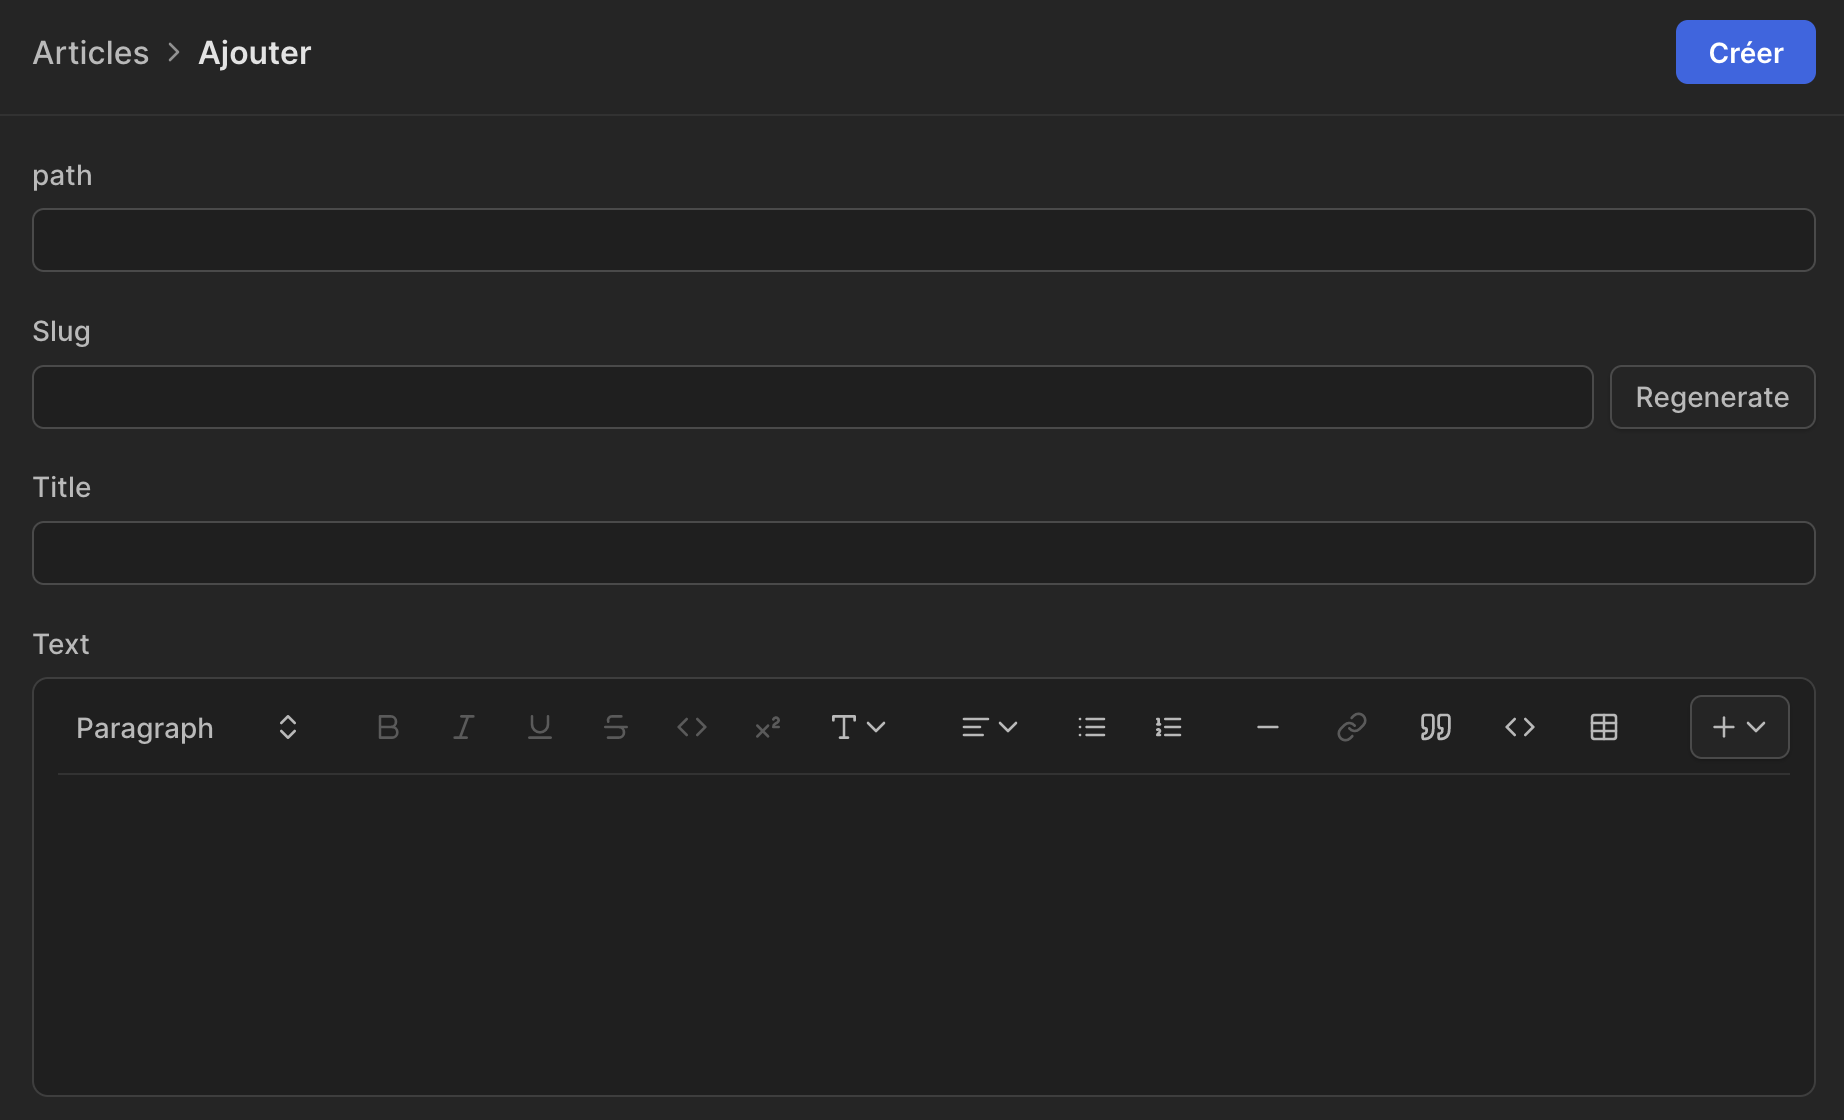
Collection is a series of items you'd want multiple instances of. It will be a series of articles for us. Some properties can be used to define our articles. Each article will have a title, an image to illustrate it, a publication date, and finally a content text. The text options will allow us to include links, tables, images, and so on.
collections: {
    articles: collection({
        slugField: "id",
        label: 'Articles',
        path: 'src/content/articles/*/',
        schema: {
            path: fields.slug({name: {label: 'path'}}),
            title: fields.text({label: 'Title'}),
            cover: fields.image({label: 'Cover Image',}),
            date: fields.date({label: 'Date'}),
            text: fields.document({
                label: 'Text',
                formatting: true,
                links: true,
                dividers: true,
                tables: true,
                images: true,
            }),
        }
    }),
}
Keystatic admin pages
Create a 'pages' directory in 'src' directory, every route within the /keystatic segment will become an Admin UI route. We can now create a new Astro page called [...params].astro in the 'keystatic' folder.
At the root of the project, create a new file 'keystatic.page.tsx', where we can import and mount our app, built with React.
import {makePage} from "@keystatic/astro/ui";
import keystaticConfig from "./keystatic.config";

export const Keystatic = makePage(keystaticConfig)
We can now import that file in the Astro page [...params].astro we created earlier.
---
import {Keystatic} from "../../../keystatic.page";
---

<Keystatic client:only/>
In the 'pages' directory, create a new file called 'api/keystatic/[...params].ts'
import { makeHandler } from '@keystatic/astro/api'
import keystaticConfig from '../../../../keystatic.config'

export const all = makeHandler({
  config: keystaticConfig,
})
One last thing we have to do is to turning on the SSR mode in our 'astro.config.mjs' file.
export default defineConfig({
+  output: 'server',
  integrations: [react()],
})
Create content
We can now visit the /keystatic page of our site and find the different data we configured.
Astro's content collection
Astro introduced a new feature to display our content. A content collection is any directory inside the reserved 'src/content' project directory. Only content collections are allowed inside the 'src/content' directory. This directory cannot be used for anything else.
We can define our collection with a config file that allow us to enjoy some great features like Frontmatter Schema or Typescript typings.
Create a 'config.ts' in your 'src/content' directory.
import { defineCollection, z } from 'astro:content';
const articlesCollection = defineCollection({
    schema: z.object({
        title: z.string(),
        path: z.string(),
    })
});
export const collections = {
    'articles': articlesCollection,
}
Keystatic will use Markdoc for our article text; to manage it, we must add a package.
npx astro add markdocAnd edit the 'astro.config.ts' file.
import { defineConfig } from 'astro/config';
import react from "@astrojs/react";
import markdoc from '@astrojs/markdoc';

// https://astro.build/config
export default defineConfig({
  output: 'server',
  integrations: [
    react(),
    markdoc()
  ]
});
Rendering
We can now render all our content!
We'll use two ways:
1/ The Reader that comes from Keystatic. We'll render our Homepage Title. And add these lines in the 'index.astro' component used for the homepage.
const reader = createReader('', keystaticConfig)
const homepageData = await reader.singletons.homepage.read()
And finally we can display it by doing this:
<h1>{homepageData.headline}</h1>2/ An other way is to query our collection(s) with getCollection() and getEntry() functions provided by Astro. We can display the list of articles we created previously.
const entries = await getCollection('articles')And add links to navigate to the a specific article.
{entries.map(item => {
    return (
        <div>
            <a href=`/posts/${item.data.path}`>
            	<h4>{item.data.title}</h4>
            </a>
        </div>
    )
})}
Write this to display the chosen article in a [post].astro component (in src/pages/posts directory):
---
import {getEntryBySlug} from "astro:content";

const slug = Astro.params.post

const entry = await getEntryBySlug('articles', slug)
const {Content} = await entry.render()

---

<div>
    <Content/>
</div>
And that's it!
Conclusion
Keystatic is a fantastic tool for quickly and easily creating a content-first website, such as a blog, and Astro allows us to build quickly and light.
Keystatic is still in its early stages, but the future will undoubtedly bring interesting features!
More information about Keystatic and Astro can be found here: