Converting an existing bare react-native app using React Navigation to an Expo project using Expo Router

Let's have a first look at Expo's new beta feature Expo Router.
We will explore this new feature by converting an existing bare react-native app using React Navigation to an Expo project using Expo Router.
Project setup
First, generate a new Expo project using the Typescript template:
npx create-expo-app -t expo-template-blank-typescriptVersions used:
expo@47.0.9(minimal version required for Expo Router:expo@46.0.13)react@18.0.1react-native@0.70.5
Install and setup Expo Router
Expo Router is based on React Navigation, you need to install its required dependencies:
npx expo install expo-router react-native-safe-area-context react-native-screens expo-linking expo-constants expo-status-barCreate a custom entry point index.js file with the following inside:
import "expo-router/entry";Modify the entry point in package.json:
{
  "name": "expo-floating-player",
  "version": "1.0.0",
  "main": "index.js", // <- this line
  // ...
}In app.json, add this key under expo :
{
  "expo": {
    "name": "expo-floating-player",
    // ...
    "scheme": "expo-floating-player" <- this line
  }
}Add a babel plugin for the router in babel.config.js:
module.exports = function(api) {
  api.cache(true);
  return {
    presets: ['babel-preset-expo'],
    plugins: [
      require.resolve("expo-router/babel"), // <- this line
    ],
  };
};Restart metro with clear cache:
npx expo start --clearMigrate initial project files
We will move this RNFloatingPlayer project to Expo: React Native Floating Player.
Read more on how to create this floating player here
First install the initial project's dependencies:
npm install react-native-track-player && npx expo install @react-native-community/sliderTo use React Native Track Player library with Expo, we need to create a development build for our project:
npx expo install expo-dev-clientnpx eas-cli build
# or
eas buildEAS is Expo's cloud solution to handle building, signing and submitting native apps to stores
This will generate the EAS configuration in eas.json. Add the following in this file to enable testing for the iOS simulator:
{
  "cli": {
    "version": ">= 3.1.1"
  },
  "build": {
    "development": {
      "developmentClient": true,
      "distribution": "internal"
    },
    "development-simulator": {     // <- add this
      "developmentClient": true,
      "distribution": "internal",
      "ios": {
        "simulator": true
      }
    },
    "preview": {
      "distribution": "internal"
    },
    "production": {}
  },
  "submit": {
    "production": {}
  }
}Then start an iOS and Android build with this:
# run in ios simulator
eas build --profile development-simulator --platform ios

# run in android emulator
eas build --profile development --platform androidWhen a build is finished, you will be prompted to install the build on your simulator/emulator. This will install the development build directly.
You could also manually download the artefact from your EAS dashboard, extract the app/apk and drop it on the simulator/emulator's home screen to install the development build.
Start the development server with:
expo start --dev-client
# or
npx expo start --dev-clientYou can now use React Native Track Player in this app.
Now that we have all our tools ready, we can start migrating !
Copy-paste the following files:
- src/player.utils.ts
- src/service.ts
- src/songs.ts
- src/components/Controls.tsx
- src/components/CustomBottomTabBar.tsx
- src/components/FloatingPlayer.tsx
Register the track-player service in index.js:
import 'expo-router/entry';
import {PlaybackService} from './service';
import TrackPlayer from 'react-native-track-player';

TrackPlayer.registerPlaybackService(() => PlaybackService);
Create a file for routing utility types:
import {NativeStackScreenProps} from 'react-native-screens/native-stack';
import {Track} from 'react-native-track-player';

export enum Routes {
  HOME = 'index',
  PLAYER = 'player',
  LIBRARY = 'library',
}

export type RootStackParamList = {
  [Routes.HOME]: undefined;
  [Routes.PLAYER]: {index: number; position?: number; queue: Track[]};
  [Routes.LIBRARY]: undefined;
};

export type RootStackScreenProps<T extends Routes> = NativeStackScreenProps<
  RootStackParamList,
  T
>;Expo Router is built on top of React Navigation, you can use some of its API with the former, like typing and base components !
Connect with Expo Router
We need to replace the useNavigation hook used in src/components/FloatingPlayer.tsx to use the navigation prop of the custom bottom bar src/components/CustomBottomTabBar.tsx component:
import {Button, Pressable, StyleSheet, Text, View} from 'react-native';
import React from 'react';
import Slider from '@react-native-community/slider';
import {usePlayerControls} from '../player.utils';
import {Routes} from '../routes.types';
import {BottomTabBarProps} from '@react-navigation/bottom-tabs';

export const FloatingPlayer = ({navigation: {navigate}}: BottomTabBarProps) => {
  const {
    currentTrackIndex,
    currentTrack,
    controls: {isPlaying, startTrack, position, duration},
  } = usePlayerControls();

  if (!currentTrack) {
    return null;
  }

  const {artist, title} = currentTrack;

  const playerPressHandler = () => {
    navigate(Routes.PLAYER, {
      index:
        currentTrackIndex && currentTrackIndex >= 0 ? currentTrackIndex : 0,
      position: position,
    });
  };

  return (
    <Pressable onPress={playerPressHandler}>
      <View style={styles.container}>
        <View style={styles.centered_row_space_between}>
          <Text>
            {title} - {artist}
          </Text>
          <Button title={isPlaying ? 'play' : 'pause'} onPress={startTrack} />
        </View>
        <Slider maximumValue={duration} minimumValue={0} value={position} />
      </View>
    </Pressable>
  );
};

const styles = StyleSheet.create({
  centered_row_space_between: {
    flexDirection: 'row',
    alignItems: 'center',
    justifyContent: 'space-between',
  },
  container: {
    backgroundColor: '#cecece',
    paddingHorizontal: 8,
    paddingVertical: 8,
  },
});Pass the props in src/components/CustomBottomTabBar.tsx:
import {BottomTabBar, BottomTabBarProps} from '@react-navigation/bottom-tabs';
import {FloatingPlayer} from './FloatingPlayer';
import {View} from 'react-native';
import React from 'react';

export const CustomBottomTabBar = (props: BottomTabBarProps) => (
  <View>
    <FloatingPlayer {...props} />
    <BottomTabBar {...props} />
  </View>
);Create an app/ folder. Any file inside containing components that are default exported, will be seen as screens by Expo Router. Then, by adding folders you can create path segments.
We need to migrate the Home, Library screens and a Player modal.
Previously we had one file /src/routes.tsx that handled creating the BottomTab and Stack navigators.
With Expo Router, you need to create layout files which will correspond to a navigator for each of its sibling files. You can nest navigators by creating a folder that contains a different layout.
Create a _layout.tsx file that will be the Stack layout for the Tabs navigator and the Player modal:
import {Stack} from 'expo-router';
import React from 'react';
import {Routes} from '../routes.types';

export default function Layout() {
  return (
    <Stack>
      <Stack.Screen name="(tabs)" options={{headerShown: false}} />
      <Stack.Screen
        name={Routes.PLAYER}
        options={{title: 'Player', presentation: 'modal'}}
      />
    </Stack>
  );
}We have two screens:
1/ The Player modal
2/ The (tabs) screen which is a special folder fragment that contains the Tab layout
We use fragment routes to add a nested layout (Tabs in this case) without adding a path segment.
Create the modal by adding a app/player.tsx file (only the import paths have changed):
import React, {FC, useEffect} from 'react';
import {ActivityIndicator, Image, StyleSheet, Text, View} from 'react-native';
import TrackPlayer from 'react-native-track-player';
import {RootStackScreenProps, Routes} from '../routes.types';
import {usePlayerControls} from '../player.utils';
import {Controls} from '../components/Controls';

const Player: FC<RootStackScreenProps<Routes.PLAYER>> = ({
  route: {
    params: {position = 0, index, queue},
  },
}) => {
  const {controls, currentTrack} = usePlayerControls();

  useEffect(() => {
    const handleQueue = async () => {
      await TrackPlayer.add(queue);
      if (index >= 0) {
        await TrackPlayer.skip(index);
      }
      if (position && position > 0) {
        await TrackPlayer.seekTo(position);
      }
    };

    handleQueue();
  }, [index, queue, position]);

  if (!currentTrack) {
    return <ActivityIndicator style={styles.centered_horizontal} />;
  }

  return (
    <View style={styles.centered_horizontal}>
      <Text>
        {currentTrack.title} - {currentTrack.artist}
      </Text>
      {currentTrack.artwork && typeof currentTrack.artwork === 'string' && (
        <Image
          resizeMode="cover"
          style={styles.image_dimensions}
          source={{uri: currentTrack.artwork}}
        />
      )}
      <Controls {...controls} />
    </View>
  );
};

const styles = StyleSheet.create({
  centered_horizontal: {
    flex: 1,
    alignItems: 'center',
    justifyContent: 'center',
  },
  image_dimensions: {
    width: 400,
    height: 500,
  },
});

export default Player;
Create a layout for the Tab in a new app/(tabs) folder:
import {Tabs} from 'expo-router';
import React from 'react';
import {CustomBottomTabBar} from '../../components/CustomBottomTabBar';
import {Routes} from '../../routes.types';
import {useInitPlayer} from '../../player.utils';

export default function Layout() {
  return (
    <Tabs initialRouteName={Routes.HOME} tabBar={CustomBottomTabBar}>
      <Tabs.Screen
        name={Routes.HOME}
        options={{title: 'Home', tabBarLabel: 'Home'}}
      />
      <Tabs.Screen
        name={Routes.LIBRARY}
        options={{title: 'Library', tabBarLabel: 'Library'}}
      />
    </Tabs>
  );
}There are two tabs:
1/ Home (the index of the app)
2/ Library
Create the Library screen by adding a app/(tabs)/library.tsx file:
import {Text, View} from 'react-native';
import React, {FC} from 'react';
import {RootStackScreenProps, Routes} from '../../routes.types';

const Library: FC<RootStackScreenProps<Routes.LIBRARY>> = () => {
  return <View />;
};

export default Library;
Create a Home screen by adding a app/(tabs)/index.tsx file (also where we initialise the track player service):
import React, {FC} from 'react';
import {Button, StyleSheet, View} from 'react-native';
import {RootStackScreenProps, Routes} from '../../routes.types';
import {useInitPlayer} from '../../player.utils';

const HomeScreen: FC<RootStackScreenProps<Routes.HOME>> = ({
  navigation: {navigate},
}) => {
  useInitPlayer();

  return (
    <View style={styles.centered_horizontal}>
      <Button
        title="Open player"
        onPress={() => navigate(Routes.PLAYER, {index: 0})}
      />
    </View>
  );
};

const styles = StyleSheet.create({
  centered_horizontal: {
    flex: 1,
    justifyContent: 'center',
    alignItems: 'center',
  },
});

export default HomeScreen;
Aaaand it's done! You can now navigate through this app using Expo Router!
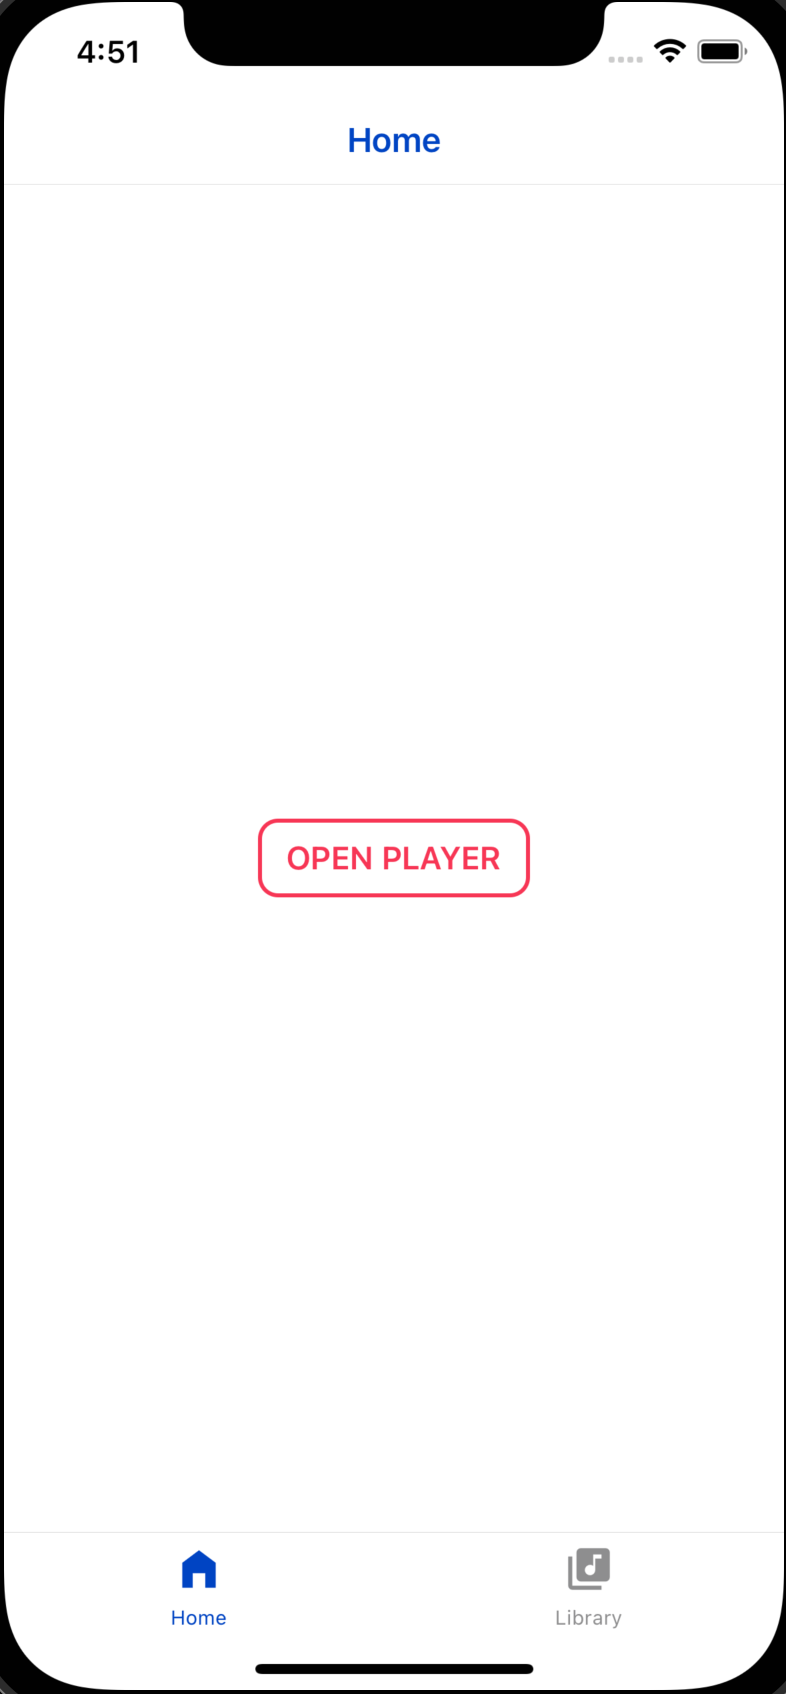
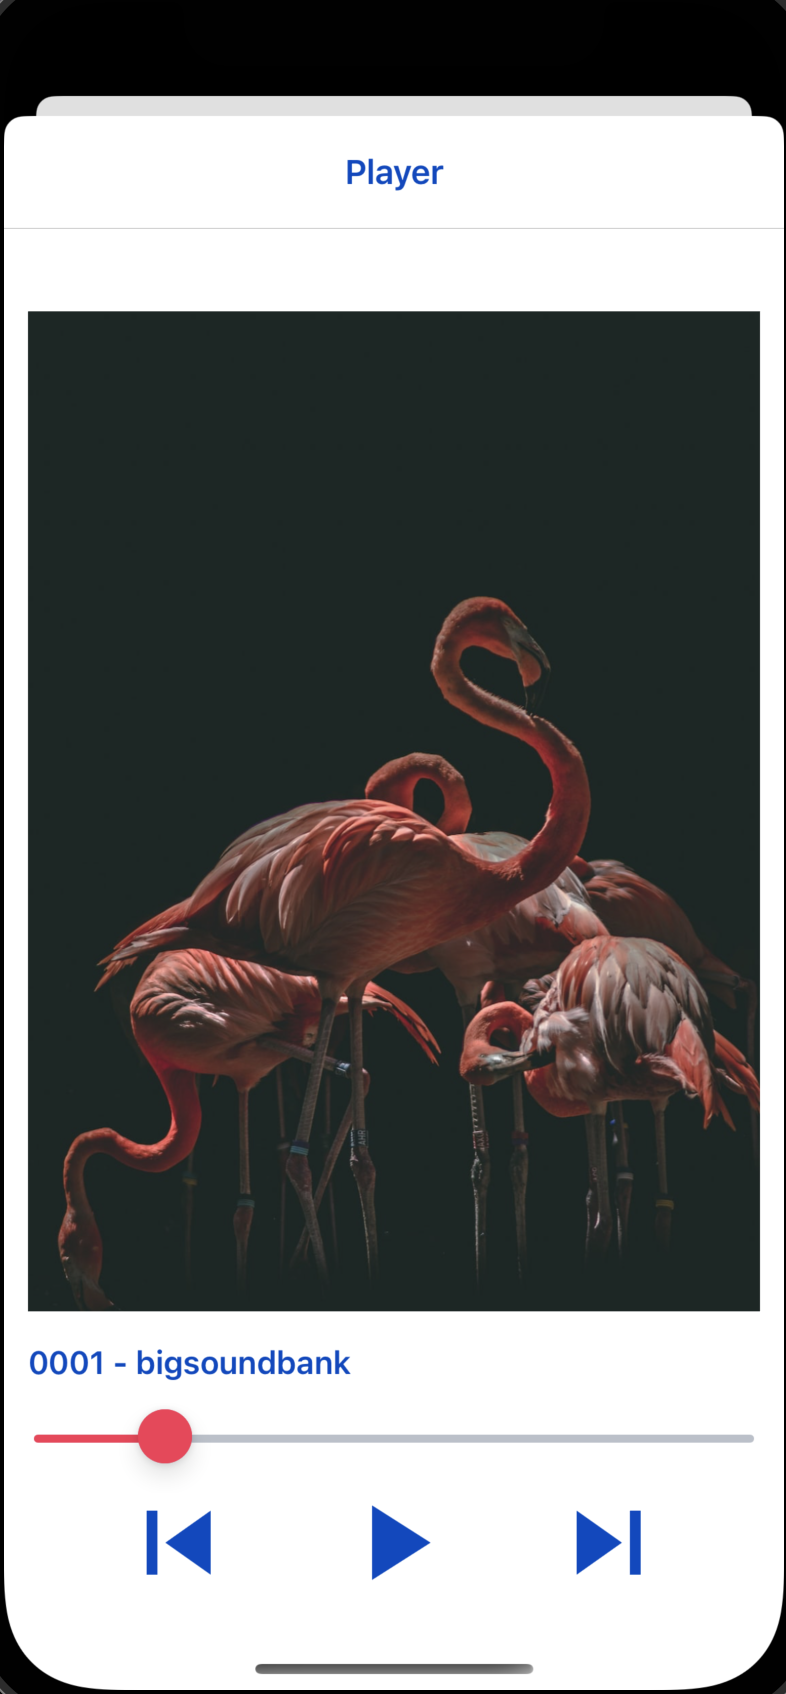
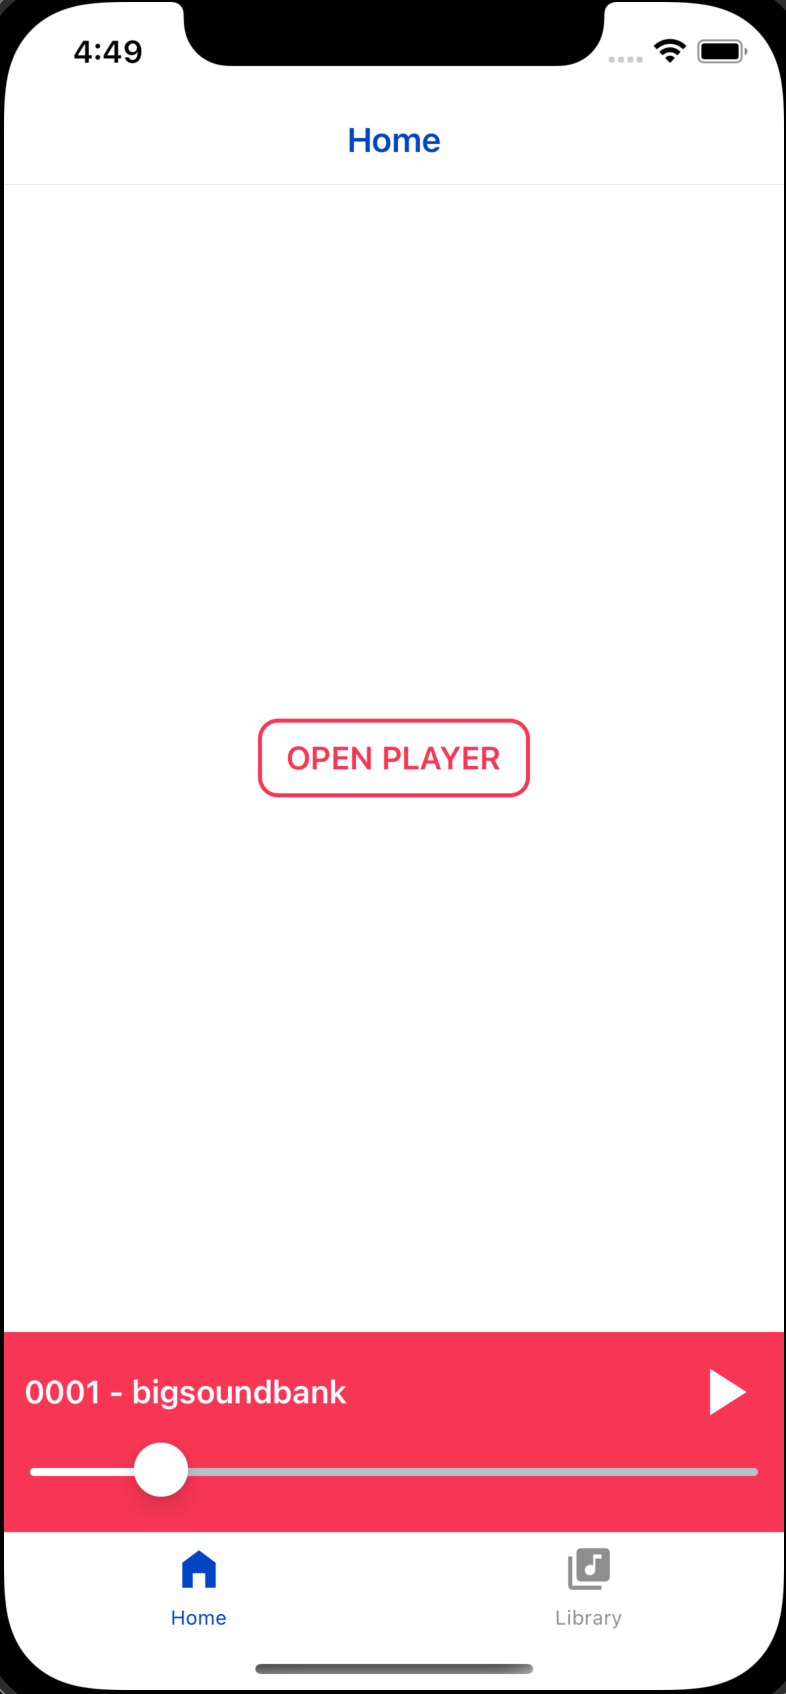
Check out the result here: Expo Floating Player.
Conclusion
Expo Router may currently be in its beta stage, but the outlook for its future is undoubtedly bright. As it continues to evolve and mature, we can expect even more powerful features and improvements that will enhance the navigation experience in Expo-based projects.
Check out our previous blogpost about React Native